Quick Answer: To grow sprouts in a jar, rinse your seeds, soak them for 4–16 hours depending on the species, then drain and rinse 2–3 times daily while storing the jar inverted at a 45° angle. No soil, light, or fertilizer needed — just clean equipment, the right seed quantity, and consistent rinsing. Most sprouts are ready to harvest in 2–7 days.
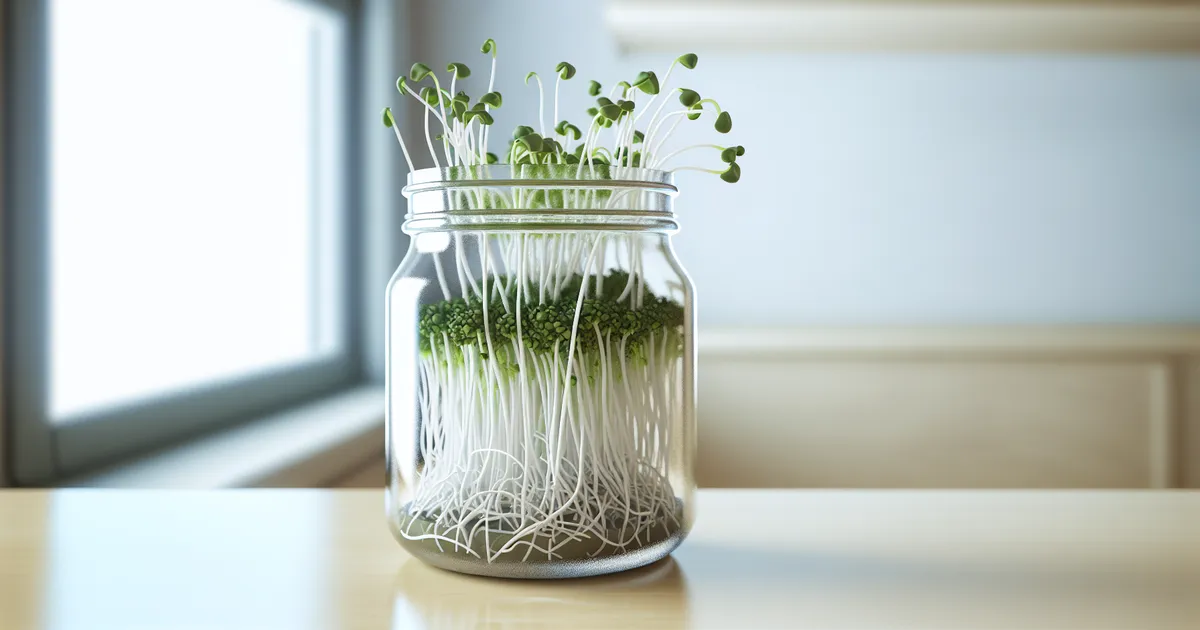
Growing sprouts in a jar is one of the easiest things you can do in a kitchen. No garden, no grow lights, no special skills required — just a mason jar, some seeds, and a few minutes of daily attention. Whether you want crunchy mung bean sprouts for stir-fries or delicate alfalfa sprouts for sandwiches, the process is essentially the same. This guide walks you through exactly how to grow sprouts in a jar, from seed selection to harvest, including fixes for the most common problems.
What You Need to Get Started
Jar, Lid, and Drainage Setup
A wide-mouth mason jar in quart (32 oz) or half-gallon size works best. The wide opening makes rinsing and harvesting easy, and mason jars are cheap and widely available.
For lids, you have two main options: cheesecloth secured with a rubber band, or a purpose-built stainless steel mesh sprouting lid. Stainless steel mesh wins on every practical front — it drains faster, allows more airflow, and doesn’t sag into the jar the way cheesecloth can. Mesh size matters too: use fine mesh for small seeds like alfalfa and clover, and coarse mesh for larger seeds like mung beans and chickpeas. The Masontops Sprouting Lid Set comes in both sizes and fits standard wide-mouth jars.
To hold your jar inverted at the right drainage angle, a dish drying rack works perfectly. If you plan to run multiple batches at once, a dedicated stainless steel sprouting jar stand keeps everything tidy and stable.
Choosing the Right Seeds
This is the single most important decision you’ll make. Always use food-grade or certified organic sprouting seeds — never seeds sold for gardening, which are often treated with fungicides such as thiram or captan. These coatings are toxic and will prevent germination anyway.
Look for bags labeled “untreated,” “non-GMO,” or “certified organic.” Quality sprouting seeds carry germination rates of 90–95%, so a small amount of seed produces a dense, healthy harvest. True Leaf Market and Handy Pantry both offer reliable, clearly labeled sprouting seed varieties.
How Much Seed to Use per Jar
Using too many seeds is the most common beginner mistake. Seeds expand dramatically during soaking — mung beans can double or triple in volume — so the jar needs room for that growth plus airflow between the sprouts.
| Seed Size | Examples | Amount per Quart Jar |
|---|---|---|
| Small | Alfalfa, clover, broccoli | 1–2 tablespoons |
| Medium | Radish, fenugreek | 2–3 tablespoons |
| Large | Mung bean, lentil, chickpea | ¼–½ cup |
How to Grow Sprouts in a Jar: Step-by-Step
Step 1 — Rinse and Soak Your Seeds
Rinse dry seeds under cool running water to remove dust and debris. Add them to your jar, fill with cool water (65–75°F / 18–24°C), and soak for the time appropriate to your seed type:
- Alfalfa, clover: 4–6 hours
- Radish, broccoli: 6–8 hours
- Mung bean, lentil, fenugreek, sunflower, wheat berry: 8–12 hours
- Chickpea: 12–16 hours
During soaking, discard any seeds that float — they’re hollow and non-viable.
Step 2 — Drain and Start the Sprouting Phase
After soaking, secure your mesh lid and drain the jar completely. Shake it gently to dislodge seeds from the sides, then invert the jar at a 45° angle in your dish rack or stand. This position allows continuous drainage while letting fresh air circulate around the seeds. Keep the jar inverted throughout the entire growing phase — never store it upright with standing water inside.
Step 3 — Rinse and Drain on a Consistent Schedule
Rinse your sprouts 2–3 times daily, roughly every 8–12 hours. Use cool to lukewarm water around 60–70°F (15–21°C). Cold water stresses the germinating embryo; warm water accelerates bacterial growth. The goal is to rehydrate the seeds and flush away metabolic waste that builds up between rinses.
After each rinse, drain completely, swirl the jar to redistribute seeds evenly, and return it inverted to your rack. Setting two or three phone alarms spaced 8–12 hours apart is the simplest way to stay consistent.
Step 4 — Harvest Your Sprouts
Most sprouts are ready when they reach ½ to 2 inches in length, typically between days 2 and 7. For alfalfa and clover specifically, move the jar to a spot with bright indirect light for the final 12–24 hours before harvest. This triggers chlorophyll production, turning the sprouts green and boosting their vitamin content.
To harvest, give the sprouts one final rinse, shake out any loose seed hulls, and spread them on a clean towel to dry briefly before refrigerating.
Sprouting Times by Seed Type
Best Beginner Sprouts
Mung beans and lentils are the ideal starting point. They’re forgiving, fast-growing, and produce satisfying yields in 3–5 days. Both tolerate a slightly imperfect rinsing schedule better than smaller seeds do. Once you’re comfortable, try broccoli or radish for a peppery kick, or alfalfa for something more delicate. Master one species before experimenting with blends.
Soak and Sprout Time Reference
| Seed | Soak Time | Sprout Time |
|---|---|---|
| Mung Bean | 8–12 hrs | 3–5 days |
| Lentil | 8–12 hrs | 3–5 days |
| Chickpea | 12–16 hrs | 3–4 days |
| Alfalfa | 4–6 hrs | 5–7 days |
| Radish | 6–8 hrs | 4–6 days |
| Broccoli | 6–8 hrs | 4–6 days |
| Fenugreek | 8–12 hrs | 3–5 days |
| Sunflower | 8–12 hrs | 2–3 days |
| Wheat Berry | 8–12 hrs | 2–3 days |
| Clover | 4–6 hrs | 5–7 days |
Seeds You Should Never Sprout Raw
A few seeds are genuinely dangerous to eat raw. Kidney beans (Phaseolus vulgaris) contain phytohaemagglutinin, a lectin that causes severe gastrointestinal distress — it’s only neutralized by boiling. Tomato and potato seeds are also unsafe to eat raw. If you’re unsure about a seed type, verify it’s on a reputable sprouting supplier’s approved list before eating.
Troubleshooting Common Sprouting Problems
Mold or Slime on Sprouts
Discard the entire batch immediately. Don’t try to rinse mold away — mycotoxins can penetrate seed tissue and aren’t visible to the naked eye. Sanitize your jar with a 1:1 white vinegar and water solution, or a 3% hydrogen peroxide rinse, then wash thoroughly before the next batch.
To prevent recurrence: rinse three times daily, ensure complete drainage after every rinse, switch to a stainless steel mesh lid if you’re still using cheesecloth, and don’t overcrowd the jar.
Sprouts Smell Sulfurous or Sour
This signals bacterial waste buildup — usually from insufficient rinsing or water that’s too warm. Increase rinsing frequency and drop your water temperature to 60–65°F (15–18°C). If the smell is strong, discard the batch, sanitize your equipment, and start fresh.
Seeds Not Germinating or Growing Slowly
The most likely culprits are temperature, water quality, or seed age. Your sprouting location should stay between 65–80°F (18–27°C) — below 55°F (13°C), enzymatic activity slows dramatically. Chlorinated tap water can inhibit germination in sensitive species; try filtered water. To test old seeds, place 10 on a damp paper towel, fold it over, and check after 48 hours. A germination rate below 70% means it’s time for a fresh packet.
Sprouts Drying Out or Wilting
Increase rinsing to every 6–8 hours, especially in winter when indoor air is dry. Check that the mesh lid isn’t clogged with seed hulls, which can block moisture from reaching the seeds.
Overcrowded Jar and Tangled Sprouts
More seeds don’t mean more sprouts — they mean worse airflow, poor rinsing contact, and higher contamination risk. Measure carefully using the quantity table above, and use two jars if you need a larger harvest.
Temperature, Light, and Placement
The ideal sprouting temperature is 65–80°F (18–27°C). Below 55°F (13°C), germination stalls. Above 85°F (29°C), bacteria multiply faster than your sprouts grow — bacterial doubling times can be as short as 20 minutes at high temperatures, which is why warm kitchens in summer require extra vigilance with rinsing.
A kitchen cabinet or pantry shelf is usually the perfect spot: consistent temperature, low light, and decent airflow. Avoid placing jars near the stove, oven, refrigerator exhaust, or air conditioning vents, all of which cause temperature swings and uneven germination.
Most sprouts — mung beans, lentils, chickpeas, radish — should be kept in low light or darkness for the majority of their growing period. Light during this phase diverts energy away from root and stem development. The exception is alfalfa and clover, which benefit from bright indirect light in the final 24–48 hours to develop chlorophyll. Never place any sprouting jar in direct sunlight; it heats the jar rapidly and accelerates bacterial growth.
Food Safety Essentials
Who Should Avoid Raw Sprouts
The FDA and CDC advise that immunocompromised individuals, pregnant women, young children, and the elderly avoid eating raw sprouts. The warm, moist sprouting environment is unfortunately ideal for Salmonella, E. coli, and Listeria — even with careful home hygiene. Cooking sprouts to 165°F (74°C) significantly reduces this risk.
Sanitizing Your Equipment
Between every batch, wash your jar and lid with hot soapy water, then sanitize with a diluted white vinegar solution (1:1 with water) or a 3% hydrogen peroxide rinse. Use a soft brush to clear hull debris from mesh lids — clogged mesh restricts drainage and creates conditions where bacteria thrive.
For an added layer of protection, add 1 tablespoon of apple cider vinegar per quart of soaking water during the initial soak. The lower pH helps reduce surface bacteria on the seeds before sprouting begins.
Storing Harvested Sprouts
After the final rinse and a brief drain, transfer sprouts to an airtight container and refrigerate immediately at 35–40°F (2–4°C). Consume within 3–5 days. Discard any sprouts that develop an off smell, sliminess, or discoloration.
Frequently Asked Questions
How often should I rinse sprouts in a jar?
Rinse 2–3 times daily, roughly every 8–12 hours. Use cool to lukewarm water around 60–70°F — cold water stresses the germinating seeds, and warm water encourages bacterial growth. After each rinse, drain completely and store the jar inverted at a 45° angle.
Why do my homegrown sprouts smell bad?
A sulfurous or sour odor almost always comes from bacterial waste buildup caused by insufficient rinsing or water that’s too warm. Increase rinsing frequency, use cooler water, and make sure the jar drains completely between rinses. If the smell is strong, discard the batch, sanitize your equipment, and start fresh.
How long does it take to grow sprouts in a jar?
It depends on the species. Sunflower and wheat berry are ready in 2–3 days. Mung beans and lentils take 3–5 days. Alfalfa and clover take 5–7 days. Most sprouts are ready to harvest when they reach ½ to 2 inches in length.
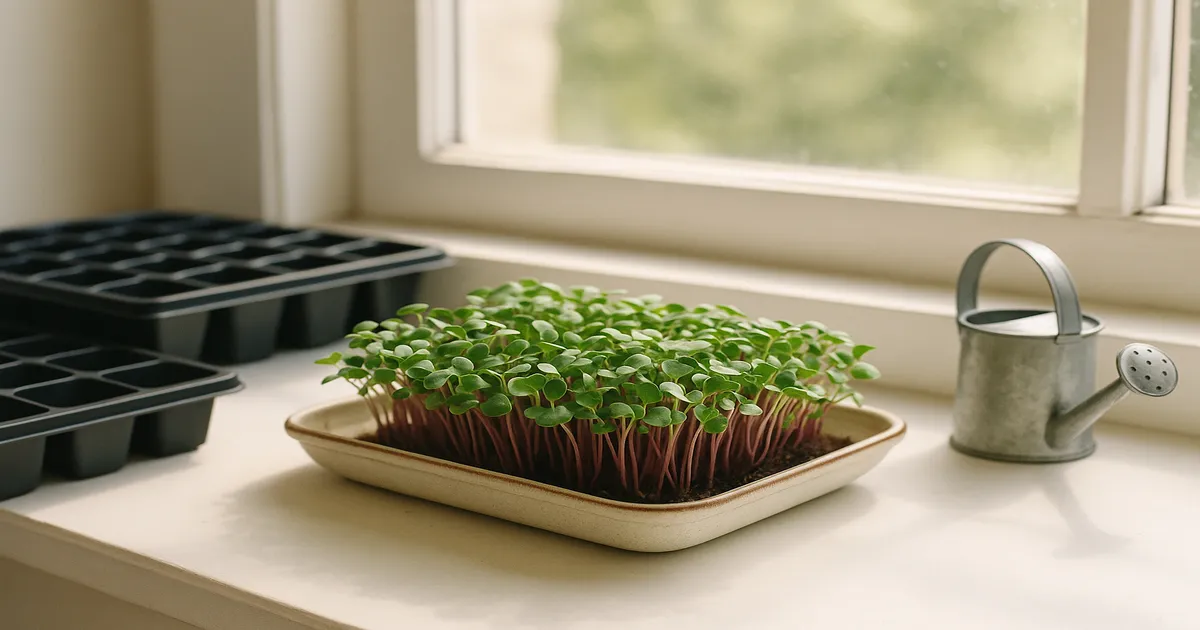
What’s the difference between sprouts and microgreens?
Sprouts are germinated seeds grown entirely in water and air — no growing medium — and harvested within days before true leaves develop. Microgreens are grown in soil or a substrate, exposed to light, and harvested after the first true leaves emerge, typically at 1–3 weeks. Sprouts include the whole seed, root, and stem; microgreens are cut just above the soil line.
Are homegrown raw sprouts safe to eat?
For most healthy adults, yes — with proper hygiene and consistent rinsing. However, the FDA and CDC advise that immunocompromised individuals, pregnant women, young children, and the elderly avoid raw sprouts due to the risk of Salmonella, E. coli, and Listeria. Cooking sprouts to 165°F eliminates most pathogens.