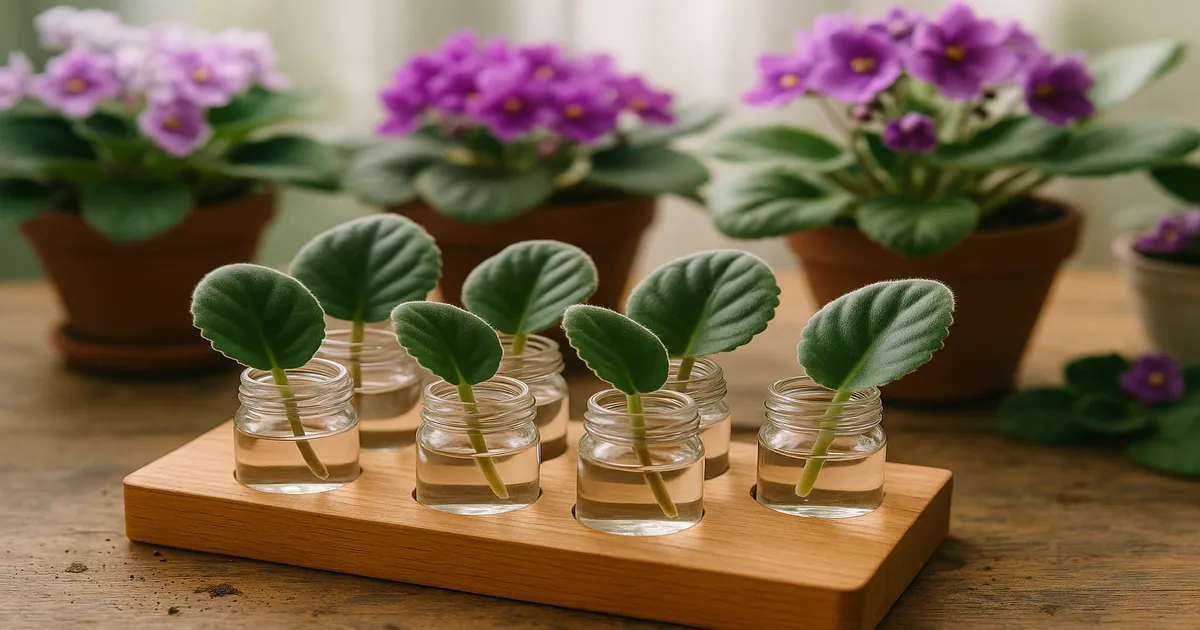
Quick Answer: The best way to propagate African violets is the leaf petiole cutting method, which delivers 85–95% success rates and produces visible plantlets in 6–12 weeks. Cut a healthy mid-row leaf with 1–1.5 inches of petiole, insert it into moist perlite, and cover with a humidity dome. For trailing types and chimeral variegated cultivars, offset division is the better choice — it’s the only method that reliably preserves certain types of variegation.
If you’ve ever searched for what is the best way to propagate African violets, here’s the short answer: it’s easier than you think, and you probably already have everything you need. These plants — technically reclassified as Streptocarpus sect. Saintpaulia following a 2006 molecular revision, though most growers still use the old name — are remarkably forgiving. A single healthy leaf can yield a dozen new plants with nothing more than a clean blade and a clear plastic bag.
The Best Methods for Propagating African Violets: All 7 Compared
Not every method suits every cultivar or situation. Here’s how they stack up.
Leaf Petiole Cutting (Best for Most Cultivars)
The gold standard. A mid-row leaf with 1–1.5 inches of petiole, inserted into perlite under a humidity dome, roots in 3–5 weeks and produces plantlets in 6–12 weeks. Success rate: 85–95%.
Offset and Sucker Division (Best for Trailing and Variegated Types)
Offsets are small secondary crowns that develop from axillary buds at the base of the plant. Because they’re already partially formed plants, success rates are high — 90–98%. This is the only reliable method for preserving chimeral variegation.
Stem Cutting for Necky Plants
When a plant develops a long, bare stem from progressive lower leaf loss (“going necky”), cut the crown and re-root it. The exposed stem produces adventitious roots in moist perlite within 3–5 weeks. The leftover stem base often sprouts new offsets as a bonus.
Leaf Cross-Section Cutting (Advanced)
Slice a single leaf blade into 1-inch horizontal sections and insert each piece cut-edge-down into rooting medium. Useful for maximizing yield from a rare leaf, but success rate drops to 50–70% — less predictable than standard petiole cutting.
Water Propagation
Place the petiole in a small jar with just the bottom ¼ inch submerged. Roots form in 3–5 weeks. The catch: water roots have a different cellular structure than soil roots, so transitioning to soil requires care.
Seed Propagation (For Hybridizers Only)
Seeds germinate in 10–21 days but do not produce true-to-type offspring. Every seedling is genetically unique — this is how new cultivars are created, not how existing ones are preserved.
Tissue Culture (Commercial Use)
The method behind those perfectly uniform plants at the garden center. Explants are grown on sterile agar in a lab setting. Not practical at home, but worth knowing about.
Step-by-Step: The Leaf Petiole Cutting Method
Step 1: Select the Right Leaf
Choose a firm, healthy leaf from the second or third row of the rosette, counting outward from the center. Center leaves are too young and lack stored energy; outer leaves have reduced cellular activity. The ideal leaf is medium-sized, deep green (or true to its cultivar’s color), and completely blemish-free.
Step 2: Make a Clean Cut
Sterilize a sharp blade with 70% isopropyl alcohol, then cut the petiole at a 45-degree angle. Leave 1–1.5 inches of petiole for standard cultivars, or 0.5–1 inch for miniatures. Under 0.5 inches and you’ll get fewer plantlets; over 2 inches and the petiole tends to rot before roots form.
Step 3: Apply Rooting Hormone (Optional)
Dip the cut end lightly into a powdered IBA rooting hormone at 0.1–0.3% concentration — the type labeled for softwood or herbaceous cuttings. Bonide Bontone II Rooting Powder is a reliable and widely available option. Tap off any excess; too much hormone can inhibit rooting rather than help it. African violets root readily on their own due to their naturally high auxin sensitivity, so this step is genuinely optional.
Step 4: Choose the Right Rooting Medium
Drainage and aeration matter far more than nutrients at this stage. Here’s how the main options rank:
- Perlite alone — best overall; excellent drainage, near-zero rot risk, encourages strong root development
- 50/50 perlite and vermiculite — slightly more moisture retention, good for drier climates
- Coarse horticultural sand and perlite (1:1) — traditional and effective
- Milled sphagnum moss — good moisture management, naturally inhibits bacteria
- Pre-moistened African violet mix — convenient, but higher rot risk than pure perlite
Avoid standard potting soil during the rooting phase — it’s too dense and holds too much moisture. Espoma Organic Perlite is a consistent, widely available choice for rooting.
Step 5: Plant and Set Up a Humidity Dome
Insert the petiole at a 45-degree angle, burying roughly half its length. Use a small 2–3 inch pot — oversized containers hold excess moisture and invite rot. Cover with a clear plastic bag or inverted plastic cup to maintain 70–80% relative humidity. Leave a small gap for minimal airflow; a completely sealed dome encourages fungal problems.
Step 6: Provide the Right Light and Temperature
Place cuttings in bright indirect light (1,500–2,500 foot-candles) or under full-spectrum grow lights running 12–14 hours per day, positioned 6–12 inches above the leaves. The Barrina T5 Full Spectrum Grow Light is a popular and affordable option for this purpose. Direct sun will desiccate the leaf before roots form. Keep temperatures between 68–75°F (20–24°C); rooting slows dramatically below 65°F. A seedling heat mat set to 70–72°F can shave 1–2 weeks off your rooting time.
Step 7: Monitor, Transplant, and Fertilize
After about 4 weeks, gently tug the petiole — resistance means roots have formed. Plantlets typically appear at the soil surface between weeks 8 and 12. At that point, begin opening the humidity dome gradually over 7–10 days to acclimate them to ambient conditions.
Transplant when plantlets reach 1–1.5 inches tall with 2–3 true leaves. Pot them individually into 2-inch pots with a well-draining African violet mix targeting pH 5.8–6.5. Espoma Organic African Violet Potting Mix is a solid ready-to-use option.
Hold off on fertilizer during rooting — fertilizer salts can burn developing root tips. Once plantlets are in their first individual pots, start with a balanced fertilizer at quarter-strength (something close to 14-12-14 NPK). After 6–8 weeks, transition to a high-phosphorus formula to encourage first flowering.
Step-by-Step: Offset Division for Trailing and Variegated Types
When to Remove Offsets
Wait until the offset has at least 3–4 of its own leaves and is roughly one-third the size of the mother plant. Removing offsets too early stresses both plants and reduces success rates significantly.
How to Separate and Root Offsets
Use a thin, sterile blade — a scalpel or clean paring knife works well — to sever the offset at its base, preserving as much of its root system as possible. If it comes away without roots, treat it like a stem cutting: nestle it into moist perlite, cover with a humidity dome, and wait 3–4 weeks.
This is the only reliable method for preserving chimeral variegation. Leaf cuttings from chimeral cultivars produce plantlets that revert to the non-variegated form, because the variegation lives in the crown’s tissue layers rather than in the leaf cells themselves.
Potting Up and Early Care
Once rooted, pot the offset into a 2-inch pot with standard African violet mix. Water sparingly for the first two weeks while the root system establishes, and hold off on fertilizer for about a month.
Fixing a Necky African Violet
“Going necky” happens when an African violet progressively sheds its lower leaves, leaving a bare, elongated stem between the soil line and the active rosette. It’s not a disease — just the natural result of the plant growing upward over time.
The fix is straightforward. Use a sterile blade to cut the entire crown away from the stem, leaving about an inch of stem attached to the crown. Remove the lowest leaf or two, insert the stem into moist perlite at a slight angle, and cover with a humidity dome. Roots typically form within 3–5 weeks.
Don’t discard the leftover stem stump. Keep it lightly moist in indirect light, and the nodes along the remaining stem will often produce new offsets — a satisfying bonus from what started as a struggling plant.
Common Problems and How to Fix Them
Cuttings rotting before rooting almost always comes down to medium that’s too wet, a completely sealed dome, or a petiole longer than 2 inches. Switch to pure perlite, leave a small air gap in your dome, and trim the petiole to the correct length. If rot has already set in, cut away the affected tissue with a sterile blade and re-insert into fresh medium.
No plantlets after 12 weeks — check temperature first. Anything below 65°F slows rooting to a near standstill. Then check light levels, which are a common and underappreciated culprit. Finally, consider whether you took the leaf from the right row; very young center leaves and very old outer leaves both underperform.
Leggy, weak plantlets are almost always a light problem. Move them closer to your light source or increase daily hours to 14. This is rarely a soil or watering issue.
Pale or brown spots on leaf cuttings are typically cold water shock — water droplets from cold tap water hitting the leaf surface. Always use room-temperature water. The spots won’t affect rooting, but they’re a signal to adjust your watering habits.
Quick Tips for Consistent Success
- Take cuttings in spring or early summer when plants are in active growth. African violets propagate year-round under grow lights, but natural conditions give you a head start.
- Sterilize your blade between every cut — not just between plants, but between cuts on the same plant.
- Use fresh rooting medium every time. Reusing old medium is one of the most common ways fungal pathogens enter a propagation setup.
- Label every cutting immediately with the cultivar name and date. African violet cuttings look nearly identical, and it takes months before plantlets bloom and reveal themselves.
- Check your water quality. If your tap water exceeds 200 ppm TDS, mineral salts can accumulate in rooting medium and inhibit root development. Switch to filtered, distilled, or rainwater. A basic TDS meter is an inexpensive tool worth having on hand.
Frequently Asked Questions
What is the best way to propagate African violets for beginners?
Leaf petiole cutting is the best starting point. It’s forgiving, requires no special equipment, and delivers 85–95% success rates. Cut a healthy mid-row leaf, leave 1–1.5 inches of petiole, insert it into moist perlite, and cover with a clear plastic bag. Most beginners see roots within 3–5 weeks.
How long does it take for African violet leaf cuttings to produce plantlets?
Roots form within 3–5 weeks, and the first tiny plantlets appear at the soil surface around 6–12 weeks after planting. Plantlets are ready to pot individually when they reach 1–1.5 inches with 2–3 true leaves — typically 3–5 months from cutting to transplant-ready size. Warmer temperatures and adequate light push things along significantly.
Do variegated African violets come true from leaf cuttings?
It depends on the type of variegation. Non-chimeral variegation (mosaic patterns and similar types) is encoded in the leaf cells and comes true from leaf cuttings. Chimeral variegation — caused by distinct genetic tissue layers in the crown — does not come true from leaf cuttings. Plantlets from chimeral varieties revert to the non-variegated base form. To preserve chimeral variegation, propagate through offset or sucker division only.
Can you propagate African violets in water?
Yes. Place the petiole in a small jar with just the bottom ¼ inch submerged, support the leaf with plastic wrap, and set it in bright indirect light. Roots form in 3–5 weeks. Because water roots have a different cellular structure than soil roots, transition the cutting to soil gradually — keep the medium very moist at first and reduce watering slowly over two weeks.
How do you separate African violet pups from the mother plant?
Wait until the pup has at least 3–4 leaves of its own and is about one-third the size of the mother plant. Use a thin, sterile blade to cut it away at the base, keeping as much of its root system intact as possible. If it comes away without roots, pot it into moist perlite under a humidity dome for 3–4 weeks, then transfer to regular African violet mix.