Quick Answer: Yes, you can propagate cast iron plant (Aspidistra elatior) — but only through rhizome-based methods. Leaf or stem cuttings alone will never produce a new plant. The three viable approaches are rhizome division, single-leaf-plus-node cutting, and seed propagation, with timelines ranging from 4 weeks to 3+ years depending on which method you choose.
Cast iron plants have a well-earned reputation for toughness, but propagation is where they play by their own rules. You can propagate cast iron plant successfully — just not the way you’d propagate most houseplants. Everything depends on the underground rhizome system. Get that right, and the process is straightforward. Just slow.
Understanding the Cast Iron Plant’s Rhizome System
What Is a Rhizome and Why Does It Matter?
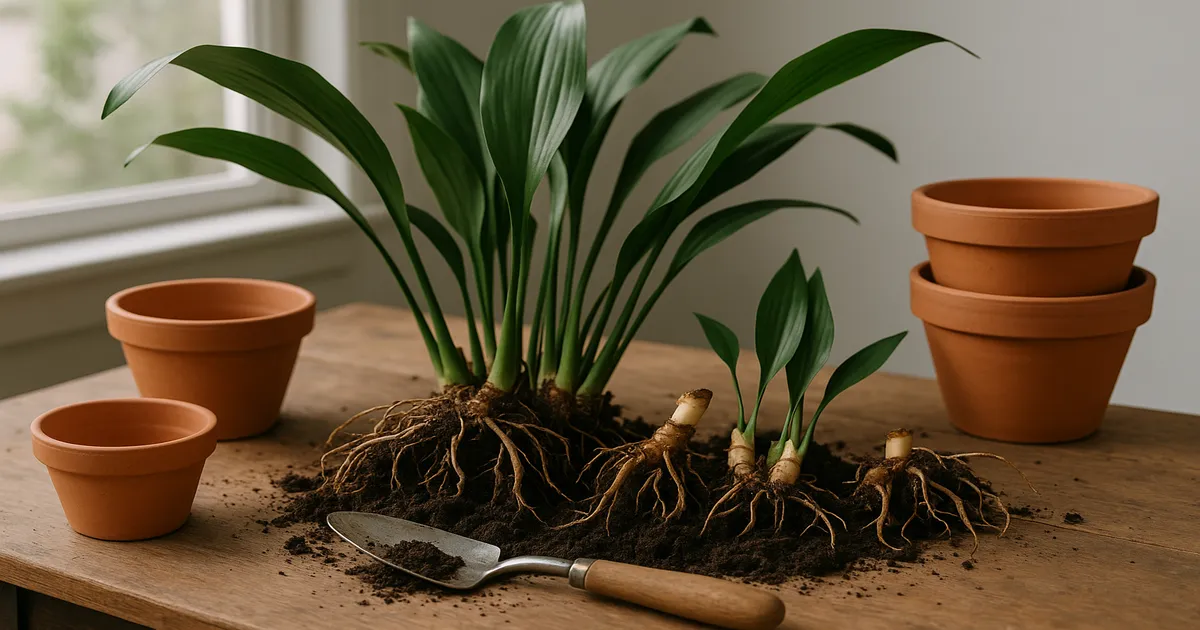
A rhizome is a horizontal, fleshy underground stem — the plant’s control centre. In Aspidistra elatior, both roots and leaf shoots emerge directly from this structure. Scattered along its surface are small bud-like protrusions called nodes, and these are the only sites where new shoots can originate.
This is why propagation requires patience. Under typical indoor conditions, cast iron plants add just 2–4 new leaves per year, so each division starts with limited resources and grows slowly from there.
Why Leaf and Stem Cuttings Will Never Work
This is the most common mistake people make. Unlike Sansevieria — a close relative in the Asparagaceae family — Aspidistra leaf tissue doesn’t contain the meristematic cells needed to generate adventitious roots or new shoots. A detached leaf will stay green and perky for weeks, giving false hope, but it will never produce a new plant.
New shoot production is locked to the rhizome nodes. No node, no new plant.
The 3 Viable Methods to Propagate Cast Iron Plant
Here’s a quick comparison before diving into each method:
| Method | Viability | Difficulty | Timeline |
|---|---|---|---|
| Rhizome division | ✅ Highly viable | Easy–Moderate | 4–12 weeks to establish |
| Single-leaf + rhizome node cutting | ✅ Viable | Moderate | 3–6 months |
| Seed propagation | ✅ Viable (rare) | Difficult | 1–3+ years |
| Stem cutting (no rhizome) | ❌ Not viable | — | Will not root |
| Leaf cutting (no rhizome) | ❌ Not viable | — | Will not produce new plant |
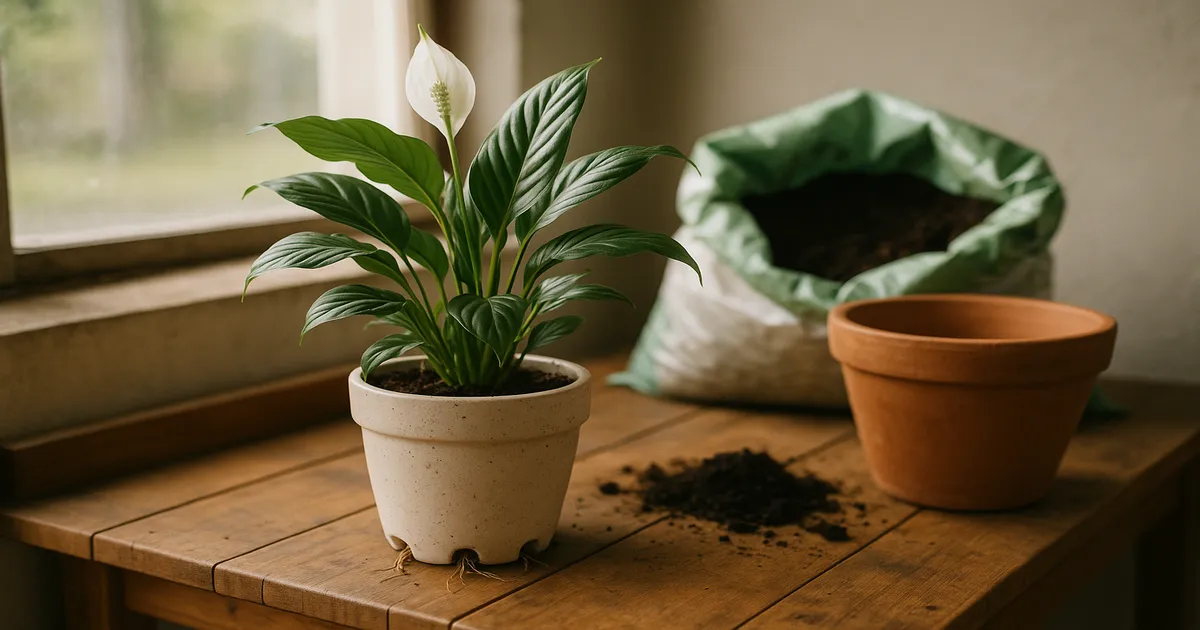
Method 1: Rhizome Division (Best for Beginners)
This is the most reliable approach and the one most gardeners use when repotting. Here’s how to do it:
- Sterilise your tools. Wipe the blade of a sharp knife or pruning saw with 70% isopropyl alcohol before and between cuts. Clean cuts matter — torn rhizome tissue invites infection.
- Identify a good division. Each piece needs at least 2–3 healthy leaves and a rhizome segment of 5–8 cm (2–3 inches), with a few intact roots attached.
- Air-dry the cut surfaces. Set the division aside in a clean, dry spot for 30–60 minutes before potting. This begins callus formation and reduces rot risk significantly.
- Dust with a fungicide. Powdered sulfur or cinnamon applied to the cut surface offers antifungal protection. A rooting hormone powder containing IBA (indole-3-butyric acid) is also worth using — it stimulates root initiation and has mild antifungal properties. Bonide Bontone II Rooting Powder works well here.
- Pot into a well-draining mix. Use a blend of 40% coco coir, 30% perlite, 20% orchid bark, and 10% horticultural charcoal. Espoma Organic Perlite is a reliable choice for the perlite component. This combination keeps the rhizome consistently moist without becoming waterlogged.
- Choose the right pot size. Go only 1–2 inches larger than the root mass. Oversized pots hold moisture the small root system can’t use, which raises rot risk.
Method 2: Single-Leaf + Rhizome Node Cutting
This method is useful when you want more divisions from a single plant without breaking it into large chunks. The key point: the leaf itself is just a sign that a node is nearby. The node does all the work.
When you remove a leaf, include a small section of rhizome with at least one visible node attached. Prepare and pot it exactly like a full division — air-dry, dust, then into your propagation mix. Expect a longer wait of 3–6 months before you see new growth, and keep conditions stable throughout.
Method 3: Seed Propagation (Rare and Advanced)
Aspidistra elatior produces unusual, fleshy, ground-level flowers pollinated by soil-dwelling invertebrates, which means indoor plants rarely set seed naturally. If you do obtain seeds from a specialist supplier, germination is slow and erratic, and seedlings take 1–3+ years to become established plants. This method suits the dedicated collector rather than the average houseplant grower.
Best Time of Year to Propagate Cast Iron Plant
Why Late Winter to Spring Is the Optimal Window
The ideal time to divide a cast iron plant is late February through April. As day length increases and temperatures rise, the rhizome’s meristematic activity ramps up — auxin production increases, enzymatic processes accelerate, and the plant is primed to generate new roots quickly. Divisions taken during this window establish noticeably faster than those taken at any other time of year.
The most reliable visual cue? Watch the parent plant. When new leaves begin to unfurl, the division window has arrived.
Propagating Outside the Spring Window
Summer propagation is workable provided temperatures stay below 85°F (29°C). Autumn and winter are the toughest periods — the rhizome is in a low-metabolic state, callus formation slows, and root initiation can stall for months. If you need to propagate outside the spring window, supplement with a grow light providing 1,000–2,000 foot-candles on a 14-hour photoperiod. Barrina T5 Grow Light Strips are a cost-effective option that fit neatly above a shelf or propagation tray. This mimics the longer days of spring and helps trigger the growth response you need.
Why Cast Iron Plant Propagation Fails
Divisions Too Small
The rhizome is the plant’s energy bank. A division with fewer than 2–3 leaves or a rhizome segment under 5 cm simply doesn’t have the stored carbohydrates to fuel both leaf maintenance and new root development at the same time. It won’t die immediately — it’ll just sit there, declining slowly. Always wait until the parent plant is pot-bound before dividing, and take no more than one division per season from a smaller specimen.
Root Rot After Cutting
Fresh rhizome cuts are vulnerable to Pythium, Fusarium, and Rhizoctonia — common soil-borne pathogens. Because cast iron plants grow slowly, wounds stay open longer than in faster-growing species, giving pathogens more time to take hold. The 30–60 minute air-dry step before potting is non-negotiable. You can also water in with a diluted hydrogen peroxide solution (3% concentration mixed 1:4 with water) immediately after potting to oxygenate the root zone and suppress anaerobic pathogens.
Wrong Soil Mix
Standard potting compost compacts over time, creating low-oxygen pockets around the rhizome that promote rot. A mix that’s too gritty, on the other hand, dries out before fragile new root hairs can establish. The 40/30/20/10 coco coir, perlite, orchid bark, and charcoal blend hits the right balance. Target a soil pH of 6.0–6.5 and make sure the pot has multiple drainage holes.
Too Much Light During Establishment
A newly divided plant has a compromised root-to-shoot ratio. Under bright light, leaves transpire water faster than the underdeveloped roots can supply it — the result looks like drought stress even when the soil is moist. Place divisions in low indirect light (50–500 foot-candles) for the first 4–6 weeks, well away from direct sun. Move gradually to medium indirect light (500–1,500 foot-candles) once new leaf growth confirms the roots are established.
Temperature Extremes
Root initiation in Aspidistra works best at a steady 68–72°F (20–22°C). Below 55°F, rhizome enzymatic activity slows to a crawl. Above 85°F, the plant burns through stored energy faster than it can replenish it. For cool rooms, a seedling heat mat set to 70°F placed under the pot targets rhizome root initiation directly. The Vivosun Seedling Heat Mat is a reliable, affordable option.
Low Humidity
Indoor air is often drier than cast iron plants prefer, especially during establishment. Aim for 60–70% relative humidity for the first 2–4 weeks by placing a clear plastic bag or humidity dome over the division. Open it for an hour or two daily to prevent stagnant air and fungal buildup.
Propagating Variegated Cast Iron Plant Cultivars
Variegated cultivars follow the same propagation principles as the species, but everything takes longer. Reduced chlorophyll means lower photosynthetic efficiency, which means slower energy production and slower establishment after division. Take only one division per season from any variegated specimen.
For ‘Milky Way’ with its distinctive white spotting, rhizome division is the only method that reliably preserves the pattern. ‘Asahi’, with its striking white leaf tips, needs bright indirect light (1,500–3,000 foot-candles) once fully established to maintain that tip coloration — but keep it in lower light during the initial establishment phase, just like any other new division.
The biggest threat to ‘Variegata’ isn’t the division process itself — it’s fertiliser. High-nitrogen feeds push the plant toward producing all-green growth at the expense of the cream stripes. Use a balanced fertiliser (10-10-10 NPK) at quarter strength, and don’t start feeding until 3–4 months after potting. Variegation is preserved through rhizome genetics, not technique, so as long as you’re dividing rather than attempting leaf cuttings, the pattern will carry through.
Aftercare: The First 3 Months
Keep the propagation mix consistently moist — not wet, not dry. Check every few days by pushing a finger an inch into the soil. If it still feels damp, wait. If it’s approaching dryness, water thoroughly and let the excess drain. A soil moisture meter takes the guesswork out of this entirely; the XLUX Soil Moisture Meter is inexpensive and accurate enough for this purpose.
Maintain low indirect light and a stable temperature of 68–72°F for the first six weeks. No drafts, no cold windowsills, no heating vents nearby. Stability matters more than any specific reading during this phase.
The tug test: At 6–8 weeks, gently grasp a leaf near its base and apply light upward pressure. Resistance means roots have begun anchoring into the medium. If the division lifts out easily, give it more time — disturbing it before it’s rooted undoes weeks of progress.
When to fertilise: Wait at least 3–4 months. New root hairs are sensitive to fertiliser salts, and feeding too early causes chemical burn that sets the plant back significantly. When you do start, use a balanced liquid fertiliser at quarter strength every 4–6 weeks during the growing season. The clearest sign your division has truly established? A brand new leaf emerging from the rhizome. That’s the moment to begin a normal care routine.
Frequently Asked Questions About Cast Iron Plant Propagation
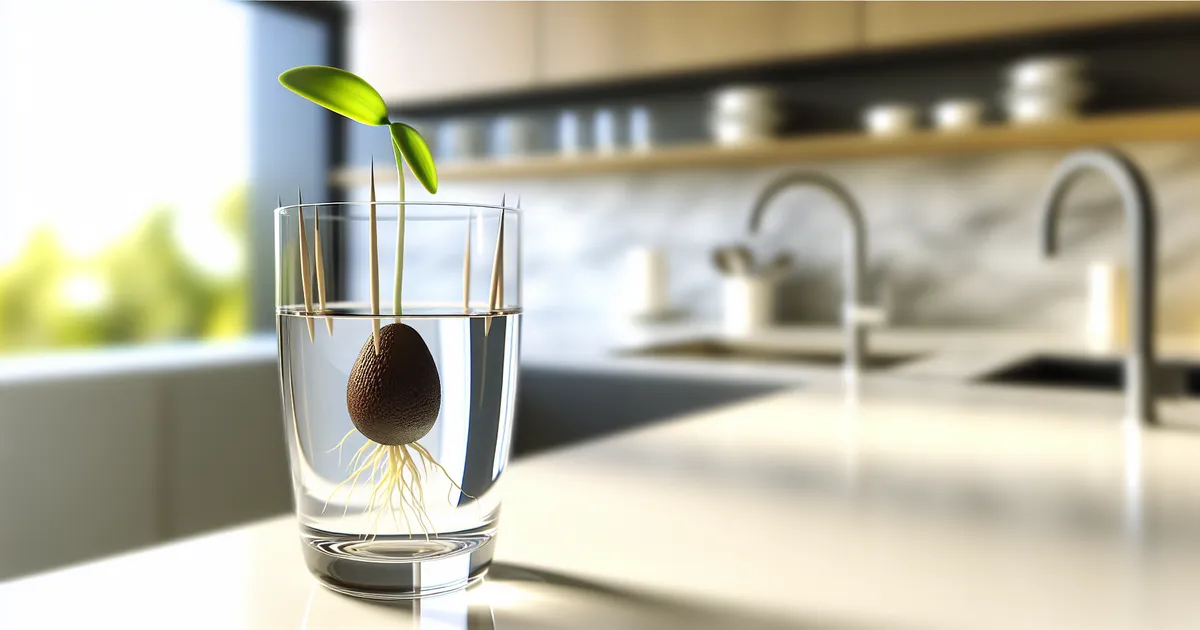
Can you propagate cast iron plant in water?
No. Unlike many houseplants that root readily in water, Aspidistra rhizomes need the structural support and aeration of a solid growing medium to initiate roots. Submerging a rhizome division in water also raises rot risk on the cut surfaces before any callus can form.
How long does it take for a cast iron plant division to root?
Most rhizome divisions show root resistance via the tug test within 6–8 weeks when propagated in spring at the right temperature. Visible new leaf growth — the clearest sign of full establishment — may take 3–6 months. Slow progress doesn’t mean failure.
Can you grow a new cast iron plant from a single leaf?
No. A detached leaf will stay alive for weeks but will never produce roots or new growth on its own. New shoots can only emerge from rhizome nodes, so any propagation attempt must include a piece of rhizome with at least one node attached.
How many leaves should each division have?
A minimum of 2–3 healthy leaves attached to a rhizome segment of at least 5–8 cm (2–3 inches). Fewer leaves means fewer carbohydrate reserves, which reduces the division’s ability to sustain itself while growing new roots. Bigger divisions establish more reliably.
Why is my propagated cast iron plant not growing?
The most likely causes are insufficient rhizome mass, division taken during dormancy (October–January), soil that’s too wet or too dry, or temperatures below 65°F. Even a healthy division may not produce a new leaf for several months — cast iron plants are naturally slow. Check for soft or discoloured rhizome tissue (a sign of rot), confirm the temperature is stable at 68–72°F, and make sure the plant is in low indirect light rather than a dark corner. If the rhizome feels firm and the tug test shows resistance, the plant is almost certainly fine — just taking its time.