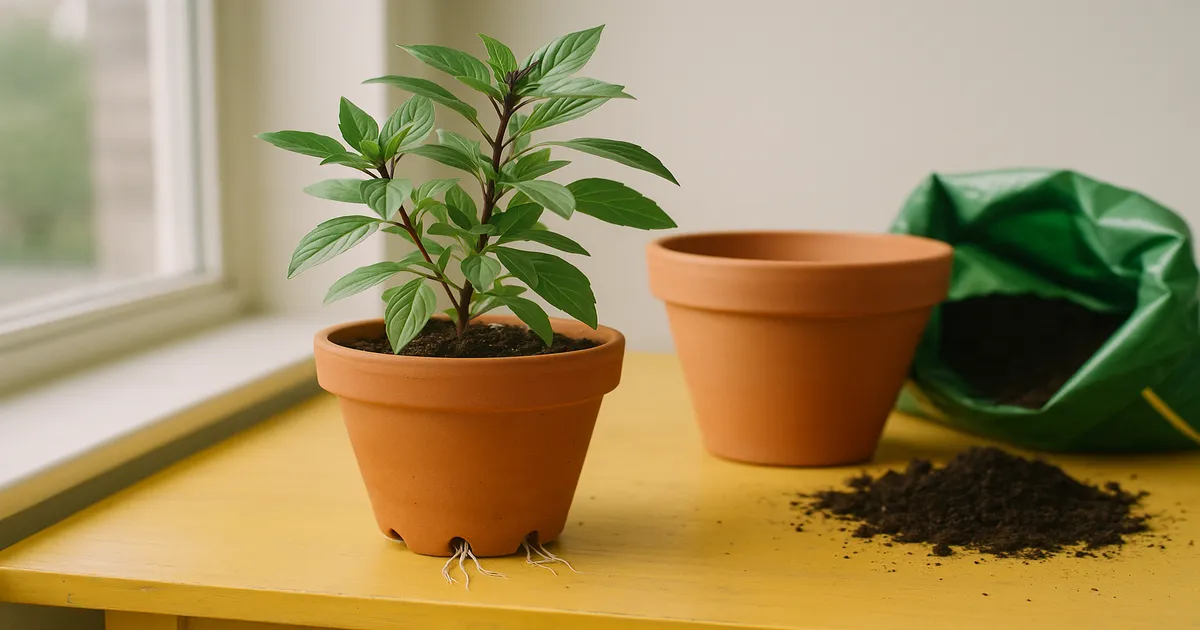
Quick Answer: Yes — repot your Thai basil, and do it soon. Grocery store pots almost always hold 10–30 overcrowded seedlings in a container far too small for even one plant. Thai basil’s roots fill a small pot in as little as 4–8 weeks, so the sooner you repot, the longer you’ll harvest. Because Thai basil is an annual, timing matters: repot at the start of the growing season or immediately when you bring a new plant home.
If you’re wondering whether you should repot your Thai basil — yes, almost certainly. And sooner rather than later. Whether you just brought home a lush pot from the grocery store or your windowsill plant is starting to look sad, knowing how to repot Thai basil correctly is the difference between a plant that produces for months and one that collapses within weeks.
Should You Repot Your Thai Basil? Here’s How to Tell
Most Thai basil plants — especially grocery store ones — are living in pots that are too small, shared with too many other plants, and starved of nutrients. Repotting gives them room to grow, fresh soil to feed from, and a real chance at a productive life.
Repotting is worth it when:
- You just bought the plant from a grocery store or garden center
- Roots are escaping the drainage holes
- The plant wilts constantly despite regular watering
- The soil dries out within 24 hours of watering
Skip repotting if:
- The plant is already flowering heavily and near the end of its life — take cuttings or start fresh seeds instead
- You repotted within the last 4–6 weeks and the plant is otherwise healthy
Why Thai Basil Outgrows Pots So Fast
Thai basil (Ocimum basilicum var. thyrsiflora) is an aggressive grower both above and below ground. Its fibrous root system can fill a small container in as little as 4–8 weeks, leaving almost no room for soil — and therefore no room for the water and nutrients the plant needs.
When roots start circling the pot perimeter (called girdling), they compress each other and restrict water and nutrient flow. Oxygen exchange at the root zone also drops sharply, stressing the plant further.
Thai basil is also an annual, which narrows your repotting window considerably. Unlike a monstera or pothos that you can repot any time, Thai basil completes its entire life cycle in a single growing season. Repot too late — once the plant has bolted and started setting seed — and you’ll get very little return on your effort.
A note on grocery store plants: Commercial growers sow 10–30+ seeds into a single 3–4 inch pot to create that full, lush look on the shelf. By the time you buy it, the soil is almost entirely root mass. Repotting isn’t optional here — it’s the only way to keep the plant alive beyond a week or two.
7 Signs Your Thai Basil Needs Repotting
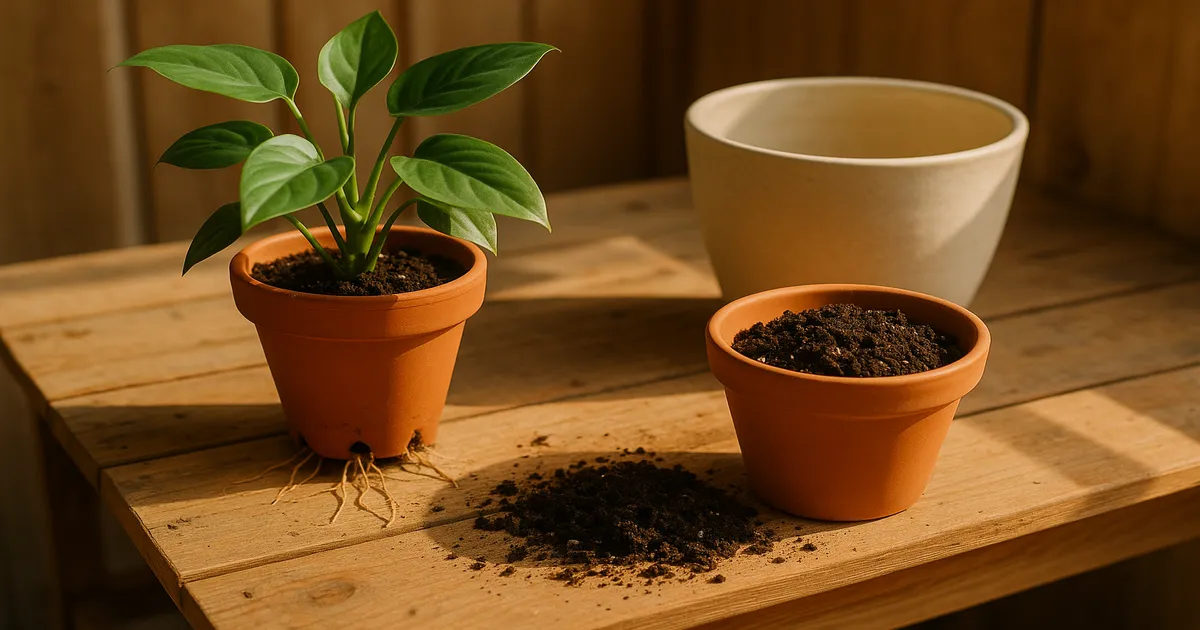
1. Roots escaping the drainage holes. Visible roots poking out of the bottom are the clearest sign the plant has run out of room. Repot as soon as possible.
2. Soil dries out within 24 hours of watering. When root mass has displaced most of the soil volume, there’s nowhere for water to be retained. If you’re watering daily and the pot still feels bone dry, the roots have taken over.
3. Wilting despite regular watering. Girdling roots restrict the plant’s ability to move water upward even when moisture is present. Consistent wilting in a well-watered plant is a strong signal the root system is compromised.
4. Yellow or discolored leaves. Yellowing older leaves usually point to nitrogen deficiency — common when Thai basil has exhausted the nutrients in a small pot. Purple tints on leaf undersides suggest phosphorus depletion. Fresh soil will help more than fertilizer alone at this stage.
5. Multiple crowded stems in one small pot. More than 3–4 distinct stem bases in a 3–4 inch pot means you’ve got a classic grocery store overcrowding situation. Each stem is a separate plant, and they all need their own space.
6. Waterlogged or foul-smelling soil. A sour or musty odor signals anaerobic conditions — the soil has compacted to the point where oxygen can’t reach the roots. This is the ideal environment for Pythium and Fusarium, the pathogens behind root rot.
7. Sudden collapse or dramatic decline. A plant that seemed fine yesterday but is now wilted, yellowed, and unresponsive to watering likely has root rot. See the root rot section below.
How to Repot Thai Basil: What You’ll Need
Pot Size and Material
Go up only 2 inches in diameter from the current pot. Jumping to a much larger pot means excess soil stays wet too long, which invites root rot. For grocery store plants you’re splitting, use 4–6 inch pots per 1–3 stems, or a 6–8 inch pot for a group of 3–4 stems.
Terracotta is the best material for Thai basil. Its porous walls allow excess moisture to evaporate and keep the root zone oxygenated. Drainage holes are non-negotiable.
One myth worth busting: don’t put gravel at the bottom of the pot. It doesn’t improve drainage — it actually raises the perched water table, making the soil above it stay wetter for longer.
Potting Mix
Use a high-quality herb or vegetable potting mix (Fox Farm Ocean Forest) amended with 20–30% perlite by volume. This keeps the mix well-draining and aerated without drying out too fast. Aim for a soil pH of 6.0–7.0 — outside this range, nutrients become locked out even if they’re present in the soil. Avoid moisture-retaining mixes designed for tropical foliage plants, and never use outdoor garden soil in containers.
Tools to Have on Hand
- Sterilized scissors or pruning snips for trimming roots
- A chopstick or skewer for teasing apart tangled roots
- Diluted hydrogen peroxide (1 part 3% H₂O₂ to 4 parts water) for treating root rot
- Slow-release granular fertilizer to mix into the potting medium at planting time
Step-by-Step: How to Repot Thai Basil
Step 1: Water first. Water thoroughly 1–2 hours before repotting. Moist root balls hold together better, and the plant enters the process less stressed.
Step 2: Remove and inspect the root ball. Tip the pot sideways and gently squeeze or tap to release the root ball. Healthy roots are white to tan and firm. Dark, mushy, or foul-smelling roots indicate rot — jump to the root rot section below.
Step 3: Separate overcrowded plants. Gently tease individual plants apart with your fingers or a chopstick, working from the outside of the root mass inward. Some root loss is fine — don’t yank aggressively, but don’t stress over minor breakage either. Aim for groups of 1–3 stems per 4–6 inch pot.
Step 4: Trim damaged roots. Use sterilized scissors to cut away any dead, mushy, or excessively long circling roots. Clean cuts heal faster than torn ones.
Step 5: Plant in fresh mix. Add a layer of fresh potting mix to the bottom of the new pot. Position the plant so the soil line sits about ½–1 inch below the pot rim. Fill in around the root ball and firm gently without compacting.
Step 6: Water in and give it a recovery period. Water thoroughly until it drains freely from the bottom, then let it drain completely. Place the plant in bright indirect light (around 1,500–3,000 foot-candles) for 3–5 days before returning it to full sun. Hold off on fertilizer for 2–3 weeks, and pinch off any flower buds that appear — the plant needs to focus on roots, not reproduction.
Repotting Thai Basil with Root Rot
Pull the root ball out and look closely. Rotted roots are brown to black, soft, and often slimy. Healthy roots are white or tan and firm. A foul, sour smell is a reliable indicator even before you see the damage.
Is it salvageable? If more than half the root system is rotted, the plant is unlikely to recover. Take stem cuttings from healthy above-ground growth and propagate fresh plants instead. If less than 50% is affected, you have a good chance of saving it.
Treatment steps:
- Cut away all rotted tissue with sterilized scissors, back to firm, healthy root material.
- Rinse remaining roots with diluted hydrogen peroxide solution (1 part 3% H₂O₂ to 4 parts water) to kill anaerobic pathogens.
- Let the roots air-dry for 15–30 minutes before planting.
- Repot into fresh, sterile, well-draining mix in a clean pot — wash the old pot with a 1:9 bleach-to-water solution first.
- Water sparingly for the first 1–2 weeks. The reduced root system can’t handle large volumes at once.
If the plant is more than 50% rotted, or if you’re close to the end of the growing season, take 4–6 inch stem cuttings just below a leaf node, strip the lower leaves, and place in water or moist perlite. Thai basil roots readily from cuttings in 1–2 weeks.
Post-Repotting Care
Watering: Water when the top 1 inch of soil is dry to the touch. A soil moisture meter removes the guesswork. Never let the pot sit in standing water for more than 30 minutes, and always allow it to drain fully after watering.
Light and temperature: Thai basil wants bright indirect light indoors (1,500–3,000 foot-candles) and full sun if it’s going outside. Keep temperatures between 65–90°F. Below 50°F, the plant suffers chilling injury — leaves blacken and the plant declines rapidly. Keep it away from cold drafts and air conditioning vents.
Fertilizing: Wait 2–3 weeks after repotting before feeding. Then use a balanced liquid fertilizer (Espoma Organic Herb! Plant Food) at half the recommended strength every two weeks during active growth. A nitrogen-forward formula supports leafy growth, but don’t overdo it — excess nitrogen reduces the essential oil content that gives Thai basil its distinctive anise-clove flavor.
Pinching: Pinch stems just above a leaf node every 1–2 weeks once the plant is established. This keeps the plant bushy, delays bolting, and extends its productive life significantly. The moment Thai basil flowers and sets seed, it shifts energy away from leaf production. Stay on top of pinching and you’ll keep harvesting for months.
Frequently Asked Questions About Repotting Thai Basil
How often should you repot Thai basil?
Because Thai basil is an annual, you typically repot once — at the start of the growing season or immediately upon purchase. If you’re growing it as a longer-term indoor container plant, check the drainage holes every 4–6 weeks and repot when roots begin to emerge, which can happen more than once in a single season given how fast this plant grows.
Can you separate and repot grocery store Thai basil?
Yes, and you almost always should. Grocery store pots contain 10–30 individual seedlings crammed together. Gently tease them apart with your fingers or a chopstick and pot groups of 1–3 stems into their own 4–6 inch pots. Expect some wilting for a few days after separation — it’s normal and usually resolves within a week.
What size pot does Thai basil need?
A single plant or 2–3 stems does well in a 4–6 inch pot. For a fuller, bushier plant with 3–4 stems, use a 6–8 inch pot. Always go up only 2 inches in diameter when repotting an established plant — oversized pots hold excess moisture and increase the risk of root rot.
Why is my Thai basil wilting after repotting?
Some wilting in the first 2–5 days is completely normal — it’s transplant shock as the plant adjusts to its new environment. Keep it in bright indirect light, water when the top inch of soil is dry, and avoid fertilizing. If wilting persists beyond a week or the plant continues to decline, check the roots for signs of rot.
Should I repot Thai basil into terracotta or plastic pots?
Terracotta is the better choice. Its porous walls allow excess moisture to evaporate, keeping the root zone oxygenated and reducing the risk of root rot — something Thai basil is particularly susceptible to. Plastic pots retain moisture longer, which can work in very dry climates but requires more careful watering discipline to avoid overwatering.