Quick Answer: Most Monsteras can be saved once you correctly identify what’s wrong. The leading culprits — in order of frequency — are overwatering and root rot, underwatering, incorrect light, pests, and environmental stress. Work through a systematic diagnosis rather than guessing, and your plant has an excellent chance of full recovery.
If you’re frantically searching “how do I salvage this Monstera,” take a breath. These plants are tougher than they look, and dramatic symptoms — yellowing leaves, crispy edges, drooping stems — rarely mean the plant is beyond saving. The key is matching what you’re seeing to the actual cause, then applying the right fix. Guessing — and accidentally making things worse — is the most common reason Monsteras don’t recover.
Diagnose Your Monstera First: Match Symptoms to Causes
Before you do anything else, spend two minutes looking closely at your plant. The symptoms tell you almost everything you need to know.
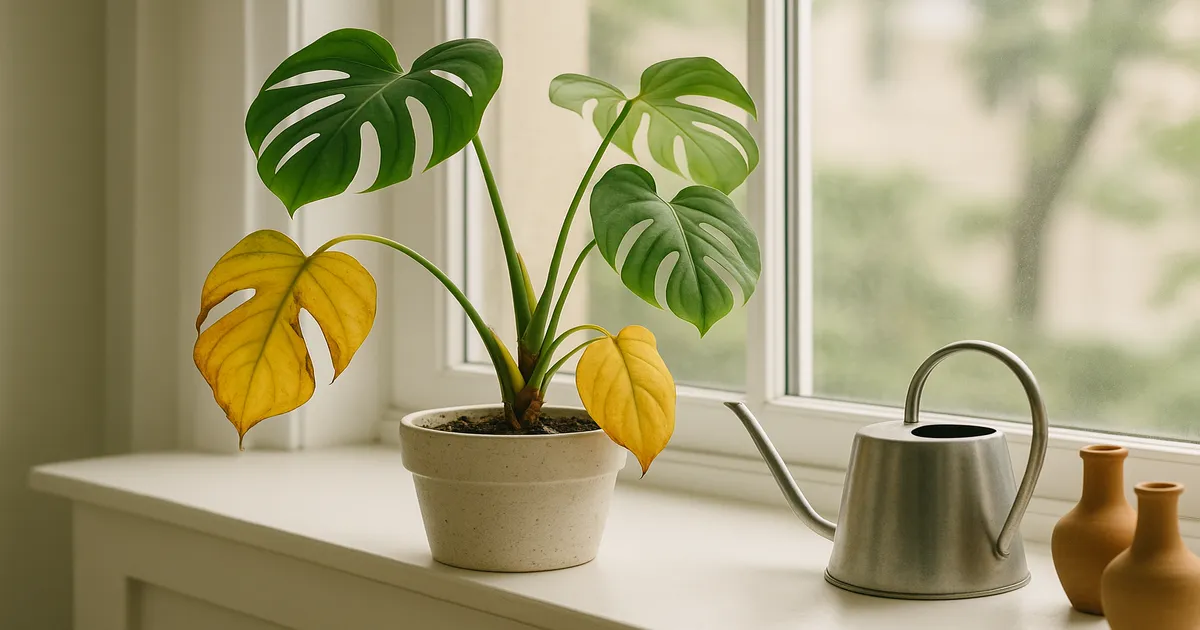
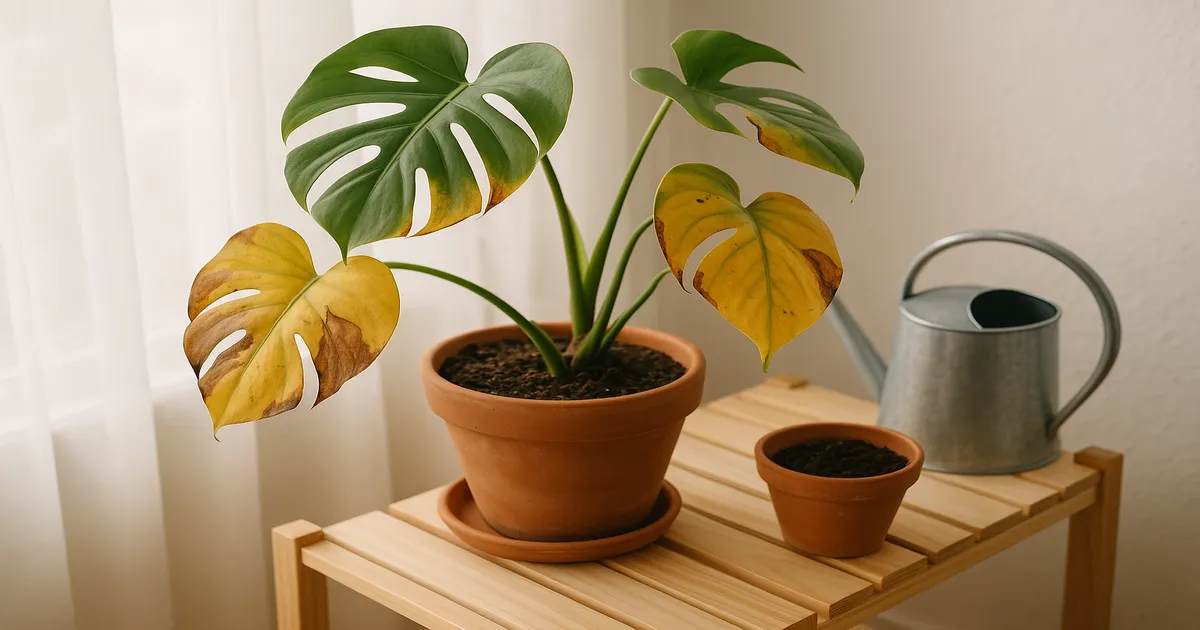
Yellowing Leaves: Overwatering, Nutrient Deficiency, or Root Rot?
Yellowing is the most common Monstera complaint, and it has several possible causes. Lower, older leaves turning uniformly yellow in consistently wet soil point to overwatering or root rot. Newer leaves emerging yellow-green with dark green veins still visible — called interveinal chlorosis — signal iron or manganese lockout, typically caused by soil pH below 5.5 or waterlogged conditions that reduce nutrient availability. Generalized paleness across the whole plant, paired with slow growth, suggests nitrogen deficiency.
Variegated cultivars like Thai Constellation and Monstera Albo are especially prone to yellowing in low light. Their reduced chlorophyll means they simply can’t process what little light they receive.
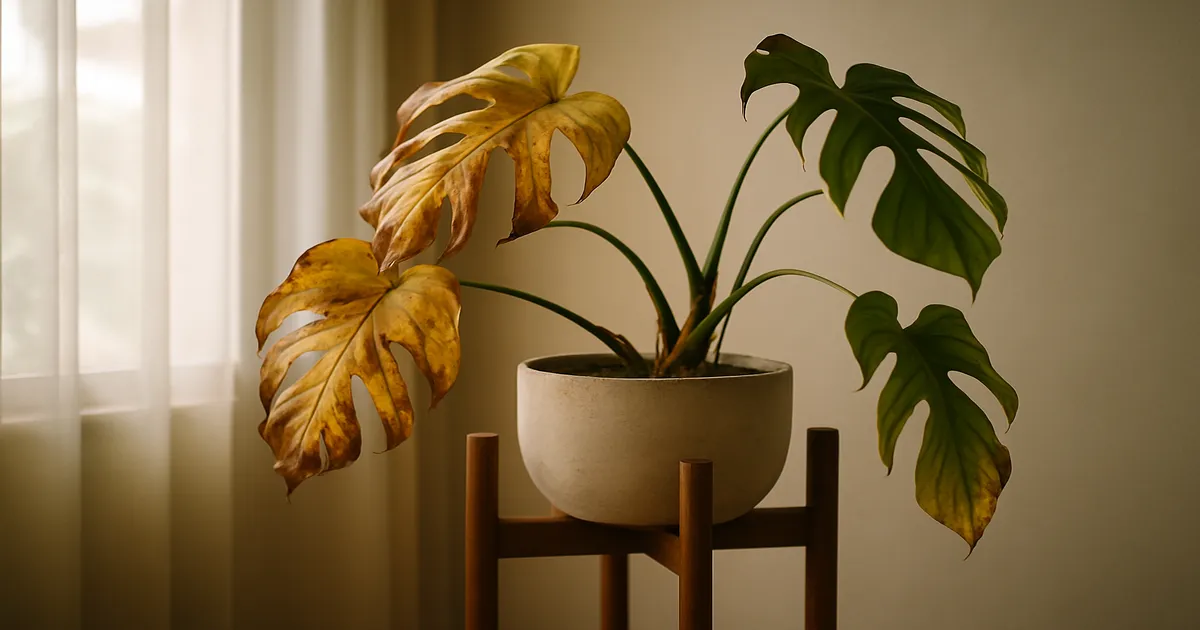
Brown Crispy Edges or Tips: Underwatering, Low Humidity, or Fertilizer Burn?
Crispy brown edges almost always mean the plant is losing moisture faster than it’s taking it in. The three most common reasons: the soil dried out completely, ambient humidity is too low (common in heated or air-conditioned rooms), or excess fertilizer salts are drawing water out of the roots. Check the soil first. Bone dry means underwatering. White crusty deposits on the soil surface or pot edges point to fertilizer salt buildup.
Wilting Despite Wet Soil: The Root Rot Paradox
This is the symptom that confuses most people. If your Monstera is wilting but the soil is soggy, the roots have likely rotted and can no longer transport water to the leaves — even though water is sitting right there. This is a genuine emergency. Get the plant out of its pot and inspect the roots immediately.
Leggy Growth and Tiny Leaves: Not Enough Light
When a Monstera doesn’t get enough light, it stretches toward any source it can find, producing long, weak stems and small leaves with no fenestrations. This is called etiolation — the plant rationing its energy. Thai Constellation and Albo varieties are particularly vulnerable because their white or cream leaf sectors contain no chlorophyll at all, leaving even less capacity for photosynthesis.
Spots, Streaks, and Webbing: Pests and Disease
Fine webbing under leaves with a stippled, bronzed appearance = spider mites. Silver streaks with tiny black dots = thrips. White fluffy masses in leaf axils = mealybugs. Brown bumps on stems = scale. Dark, water-soaked lesions with yellow halos = fungal leaf spot. Identification matters before you treat — each pest requires a different approach.
Note: If you bought a “Mini Monstera,” it may actually be Rhaphidophora tetrasperma — care is similar, but it’s a different genus entirely.
How to Salvage a Monstera with Root Rot
Root rot is the number one killer of indoor Monsteras. Even severe cases can often be turned around if you act quickly.
Inspect and Assess the Damage
Remove the plant from its pot and gently shake or rinse off the soil under lukewarm water. Healthy roots are white to tan and firm. Diseased roots are brown or black, mushy, and often smell faintly sulfurous. If less than half the root system is affected, recovery is very likely. If most roots are gone, you’ll need to work harder — but don’t give up yet.
Step-by-Step Root Pruning and Treatment
- Sterilize scissors or pruning shears with 70% isopropyl alcohol.
- Cut away all mushy, brown, or black roots. Be decisive — leaving diseased tissue behind allows rot to spread.
- Dust cut surfaces with powdered sulfur or cinnamon, or rinse the root ball with a 3% hydrogen peroxide solution diluted 1:1 with water.
- For severe infections, apply a biological fungicide containing Trichoderma spp. These beneficial fungi actively outcompete Pythium and Phytophthora, the organisms most often responsible for root rot in aroids.
Repotting After Root Rot
Repot into a fresh, fast-draining aroid mix — the recipe is in the Prevention section below. Choose a pot only 1–2 inches larger than what remains of the root ball; going too large means excess wet soil around the roots, which recreates the problem. Make sure drainage holes are clear and unobstructed.
Aftercare in the Weeks Following Treatment
Don’t water for 5–7 days after repotting. This allows cut root ends to callous, reducing the chance of reinfection. Place the plant in bright indirect light — 1,500–3,000 foot-candles — and hold off on fertilizer for 4–6 weeks. Expect some leaf yellowing during recovery. It’s normal, and not a sign of failure.
How to Salvage an Underwatered or Dehydrated Monstera
Rehydrating Bone-Dry, Hydrophobic Soil
When peat-based potting mix dries out completely, it becomes hydrophobic — water poured on top runs straight down the sides of the pot and out the drainage hole without ever reaching the roots. The plant stays bone dry no matter how much you water.
The fix is bottom-watering: set the pot in a basin of room-temperature water for 30–45 minutes and let the substrate absorb moisture from below. If the soil is extremely resistant, add 1–2 drops of liquid dish soap per liter of water to break the surface tension, or use a dedicated horticultural wetting agent. (Dyna-Gro Pro-TeKt)
After rehydration, trim any fully brown, crispy leaves — they won’t green up again. Then raise humidity to 60–80% RH using a cool-mist humidifier placed 2–3 feet from the plant.
Establishing a Consistent Watering Routine
- Monstera deliciosa: Water when the top 1–2 inches of soil feel dry.
- Monstera adansonii: Water when the top 0.5–1 inch is dry — it’s smaller, dries out faster, and is more sensitive to dehydration stress.
A moisture meter removes the guesswork entirely and is one of the most useful tools you can own as a Monstera grower.
Correcting Light Problems
Signs Your Monstera Isn’t Getting Enough Light
Etiolated stems, tiny new leaves with no fenestrations, and a complete halt in growth are the classic signs. Monsteras need bright indirect light — 1,500–3,000 foot-candles — to thrive. Position the plant within 3–5 feet of an east- or west-facing window, or right beside a south-facing window with a sheer curtain to diffuse intensity. Variegated cultivars need the upper end of that range (2,500–3,000 foot-candles) because their white or cream sectors contribute nothing to photosynthesis.
Using Grow Lights to Supplement Natural Light
If your space doesn’t have adequate natural light, a full-spectrum LED grow light running at 1,500–3,000 foot-candles (30–50 µmol/m²/s PPFD) for 12–14 hours a day will do the job. Rotate the plant 90° every two weeks so all sides receive even exposure.
Protecting Your Monstera from Direct Sun Damage
Too much direct sun causes bleached, papery tan or white patches — sunscald. Move the plant back from the window or add a sheer curtain. Don’t remove sunscalded leaves right away; they’re still photosynthesizing in the unaffected areas and provide some protection while new growth establishes.
Treating Pests on a Struggling Monstera
Isolate any pest-affected plant immediately — before you do anything else — to prevent spread to your other plants.
Spider mites: Shower the plant thoroughly with lukewarm water, focusing on leaf undersides. Then apply a neem oil solution (2 tsp neem oil + 1 tsp insecticidal soap per liter of water) every 5–7 days for 3–4 cycles. Raising humidity above 60% RH is both a treatment and a prevention strategy — spider mites struggle to reproduce in humid conditions.
Thrips: These are the hardest pest to eradicate because they lay eggs inside leaf tissue. Remove and destroy heavily damaged leaves, then apply a spinosad-based insecticide every 7 days for at least four cycles. Yellow or blue sticky traps help you monitor whether adult populations are declining. For severe, recurring infestations, an imidacloprid soil drench is a systemic option — but keep treated plants away from pollinators.
Mealybugs: Dab individual colonies with a cotton swab soaked in 70% isopropyl alcohol, then follow up with weekly insecticidal soap sprays for 4–6 weeks. Always check the roots — root mealybugs hide in the soil and are only discovered at repotting. If present, bare-root the plant, rinse thoroughly, and treat with a neem oil soil drench.
Scale: Remove insects physically first using a soft toothbrush, then apply horticultural oil to smother survivors. Armored scale may need a systemic insecticide, as contact treatments can’t penetrate the protective shell.
Fungus gnats: Adults are annoying but harmless; their larvae feed on fine root hairs in moist soil. Let the soil dry out more between waterings — larvae can’t survive dry conditions. A Bacillus thuringiensis var. israelensis (Bti) soil drench kills larvae biologically without harming the plant. Yellow sticky traps at soil level catch adults, and a 1–2 inch top-dressing of coarse perlite or horticultural sand deters females from laying eggs.
Environmental Stress, Nutrient Problems, and Repotting Shock
Cold Damage, Low Humidity, and Heat Stress
Cold damage shows up as dark, water-soaked patches that quickly turn black and collapse. Move the plant away from cold windows, exterior walls, and drafts — anything below 55°F (13°C) causes cellular damage. Remove blackened tissue with sterile tools and don’t fertilize until new growth appears.
Low humidity causes brown leaf edges and suppresses fenestration development. A cool-mist humidifier targeting 60–80% RH is the most reliable fix. Pebble trays offer a modest boost — typically 5–10% RH immediately around the plant — and are worth using as a supplement. Skip misting; it evaporates too quickly to help and can promote fungal leaf spots.
Heat stress from nearby vents looks similar to underwatering — wilting despite moist soil. Move the plant away from heat sources and improve air circulation with a small fan on a low setting.
Identifying and Correcting Nutrient Deficiencies
- Generalized yellowing + slow growth: Nitrogen deficiency. Resume a balanced liquid fertilizer (20-20-20) at half strength, monthly during spring and summer. (Jack’s Classic All Purpose 20-20-20)
- New leaves yellow-green with dark veins: Iron or manganese lockout. Check soil pH — it should be 5.5–6.5. Use a calibrated pH meter rather than test strips for accuracy. Apply chelated iron, which stays available across a wider pH range than standard iron sulfate.
- Yellowing between veins on older leaves: Magnesium deficiency. Apply Epsom salt (magnesium sulfate) at 1 teaspoon per liter of water as a soil drench, once monthly.
- Crispy edges after recent fertilizing: Salt toxicity. Flush the soil with 3–4 times the pot volume of plain water, then withhold fertilizer for 6–8 weeks.
Recovering from Repotting Shock
Repotting shock is normal and not a crisis. Drooping, a few yellowing leaves, and a temporary pause in growth are all expected as the root system re-establishes. Keep the plant in bright indirect light, water correctly, and resist the urge to fertilize. Most Monsteras bounce back fully within 2–4 weeks.
Prevention: Keeping Your Monstera Healthy Long-Term
The Ideal Soil Mix for Monstera
A well-draining aroid mix is the single most important factor in long-term Monstera health. A reliable DIY recipe:
- 40% perlite
- 30% orchid bark (medium grade)
- 20% coco coir
- 10% worm castings
This combination gives you excellent drainage, good aeration, and enough organic matter to hold nutrients without staying waterlogged.
Pot Material, Size, and Drainage
- Terracotta: Porous walls wick moisture away from the root zone — ideal if you tend to overwater.
- Glazed ceramic or plastic: Retains moisture longer — better if you forget to water or live in a very dry climate.
- Never go more than 2 inches larger than the root ball when sizing up. A pot that’s too large holds excess wet soil around the roots, recreating overwatering conditions even with perfect watering habits.
Seasonal Care Adjustments
Monsteras follow the sun. As days shorten in autumn, reduce watering frequency — the plant grows more slowly and soil takes longer to dry. Stop fertilizing entirely in winter and resume in spring at half strength. If you use grow lights, extending the photoperiod to 14 hours in winter compensates for reduced natural light.
When and How to Repot
Spring is the ideal time to repot, when the plant has maximum energy for root regeneration. Signs it’s time: roots emerging from drainage holes, soil drying out within a day or two of watering, or visible roots circling above the soil surface. When repotting, gently loosen any circling roots before placing in the new pot — left coiled, they can eventually girdle the plant.
Frequently Asked Questions About Salvaging a Monstera
Can a Monstera recover from root rot?
Yes, in most cases. Even severe root rot can be survived if healthy roots remain and you act quickly. Remove all diseased tissue, treat with an antifungal agent, repot into fresh well-draining mix, and withhold water for 5–7 days. The plant will likely drop some leaves during recovery, but new growth is a reliable sign the rescue worked.
Why are my Monstera’s leaves turning yellow even though I water it regularly?
Regular watering is often the problem, not the solution. If the soil stays wet between waterings, the roots are being deprived of oxygen and may be rotting — which prevents the plant from absorbing water or nutrients, causing yellowing. Check whether the soil is still moist before you water again, and inspect the roots if yellowing is widespread.
How do I know if my Monstera is overwatered or underwatered?
Check the soil and the pot weight. Overwatered plants sit in consistently soggy soil, the pot feels heavy, and leaves yellow and may feel soft. Underwatered plants have bone-dry soil that pulls away from the pot edges, a noticeably light pot, and leaves with crispy brown edges that curl inward. A moisture meter gives you a definitive answer when you’re unsure.
Should I cut off damaged Monstera leaves when trying to save the plant?
It depends on the damage. Fully brown, crispy leaves won’t recover and can be removed. Sunscalded leaves — even with large bleached patches — should stay until new growth establishes, since they still photosynthesize in undamaged areas. Yellowing leaves can stay unless they’re fully yellow and mushy, which indicates active rot.
How long does it take a Monstera to recover after repotting?
Most Monsteras show signs of stress for 2–4 weeks after repotting — drooping, a pause in new growth, and occasional leaf yellowing are all normal. As long as you’re providing correct light and water, the plant will re-establish on its own. Fertilizing too soon or overwatering during this window are the most common mistakes that extend recovery time.