Quick Answer: The most common reasons your alocasia is struggling are overwatering and root rot, low humidity, incorrect light levels, pest infestations, or natural dormancy. Most problems are fixable — and even a plant that has dropped every leaf can recover from its corm. Find your symptom in the section headers below and jump straight to the fix.
What Is Wrong with My Alocasia? Start Here
If you’re asking “what is wrong with my alocasia?”, you’re almost certainly dealing with one of these five issues:
- Overwatering / root rot — the leading killer; causes yellowing, wilting in wet soil, and foul-smelling roots
- Low humidity — causes crispy brown tips and papery leaf edges
- Incorrect light — too little causes leggy growth and yellowing; too much causes bleached patches
- Pests — spider mites, thrips, mealybugs, scale, or fungus gnats
- Dormancy — a normal leaf-drop that looks alarming but usually isn’t
Each section below explains what’s happening, how to confirm the diagnosis, and exactly how to fix it. If you’re not sure whether your plant is dead or dormant, skip to the dormancy section — alocasias grow from corms and can push out entirely new growth even after losing every leaf.
Overwatering and Root Rot
How to Recognise Overwatering
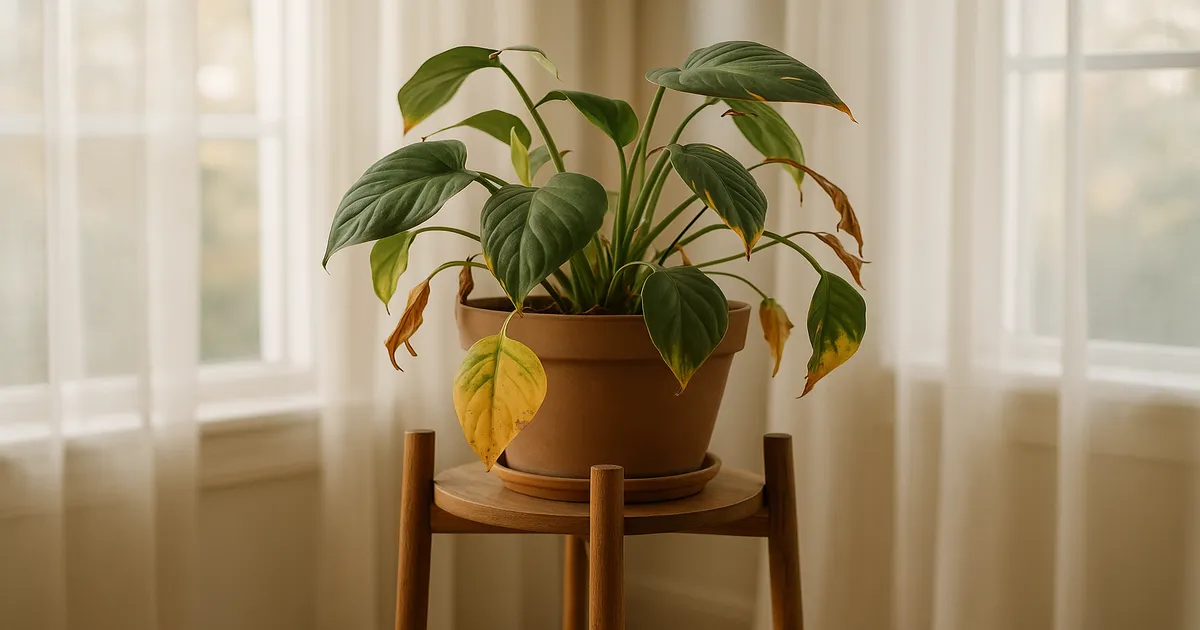
Yellowing leaves that start at the bottom of the plant and work upward are the first warning sign. The stem base may feel soft or mushy, the potting mix smells sour, and — most tellingly — the plant wilts even though the soil is clearly wet. That last detail is the giveaway.
What Root Rot Does to Your Plant
Saturated soil drives out oxygen, creating anaerobic conditions that allow pathogens — particularly Pythium, Phytophthora, and Rhizoctonia — to colonise the root zone. Infected roots turn brown or black, disintegrate when touched, and can no longer move water or nutrients to the leaves. The plant wilts not because it lacks water, but because its delivery system has been destroyed.
Several factors make rot more likely: pots without drainage holes, dense compacted soil, low light (which slows water uptake), and cold temperatures below 60°F (15°C).
Step-by-Step Root Rot Treatment
- Unpot the plant and shake away as much old soil as possible.
- Inspect the roots. Healthy roots are white or tan and firm; rotted roots are brown, black, or mushy.
- Trim all damaged roots with sterile scissors — wipe the blades with rubbing alcohol between cuts.
- Treat remaining roots by soaking briefly in a diluted hydrogen peroxide solution (3% hydrogen peroxide mixed 1:4 with water) or dusting with a sulfur-based fungicide.
- Repot into fresh, well-draining mix in a clean pot with drainage holes, sizing up only 1–2 inches in diameter from the remaining root ball.
- Withhold watering for 3–5 days to let cut root ends callous before resuming normal care.
Overwatering vs. Underwatering
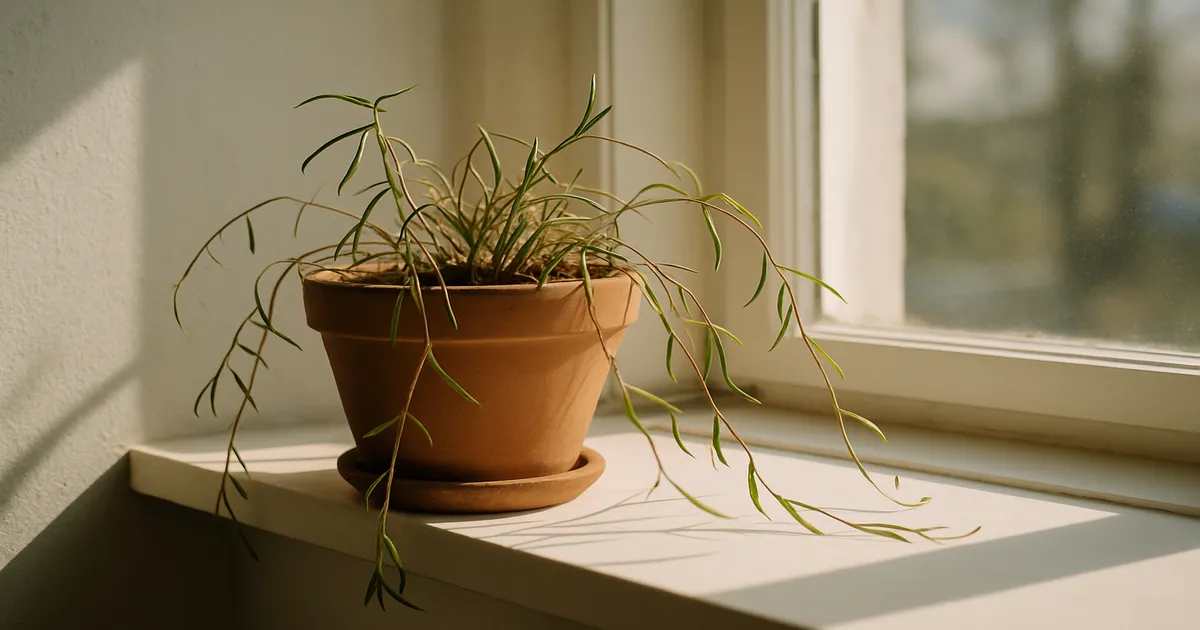
Both cause wilting, which is confusing. The soil tells the story: wet and heavy means overwatering; bone dry and pulling away from the pot edges means underwatering. Underwatered alocasias also show inward-curling leaves and crispy brown edges rather than soft, yellowing tissue.
Low Humidity and Watering Issues
Why Alocasias Need High Humidity
Alocasias evolved on tropical rainforest floors where relative humidity sits between 60–90%. Most homes hover around 30–50% RH — fine for you, but chronically stressful for a plant that loses water rapidly through its large leaf surfaces. This gap is one of the most underrated causes of decline.
Brown Crispy Tips: The Humidity Culprit
Low humidity shows up first at the leaf margins and tips, which turn brown and papery — a condition called tip burn. Forced-air heating in winter and air conditioning in summer both strip moisture from the air and make it significantly worse. If your brown tips are crispy and dry rather than soft or discoloured, humidity is almost certainly involved.
The most reliable fix is a humidifier placed near the plant; aim for 60–70% RH. A humidifier such as the Levoit Classic 300S Ultrasonic Humidifier works well for a single room. A pebble tray (pot base sitting above the waterline) offers a modest localized boost, and grouping plants together raises ambient humidity through shared transpiration.
Avoid misting leaves directly. It doesn’t meaningfully raise humidity, and moisture sitting on leaf surfaces promotes fungal disease.
Underwatering: Signs and the Fix
Underwatering is less common than overwatering, but it does happen — especially in summer when the plant is actively growing. Check the top 1–2 inches of soil with your finger before every watering. When it is dry, bottom-watering (setting the pot in a tray of room-temperature water for 20–30 minutes) ensures the entire root zone hydrates evenly. Avoid the drought-then-flood cycle; consistent moisture is what alocasias want.
Where possible, use filtered or rainwater. Alocasias can be sensitive to fluoride and chlorine in tap water, and these are a contributing cause of tip burn. A long-spouted watering can such as the Haws Slimcan Indoor Watering Can makes it easy to water at soil level without splashing foliage.
Light Problems: Too Little or Too Much
Not Enough Light
The ideal range is bright indirect light — roughly 1,500–3,000 foot-candles. Below that, photosynthesis slows, growth becomes leggy, new leaves emerge smaller than expected, and the plant develops a washed-out yellow appearance. There’s a secondary problem too: a plant in low light uses water much more slowly, dramatically increasing the risk of overwatering.
Too Much Direct Sun
Alocasia leaves are thin and not built for intense direct sun. Exposure above roughly 5,000 foot-candles bleaches the leaf tissue, leaving tan, papery, or white patches. Unlike pest damage, sunscald patches don’t spread — they stay where they are. Scorched tissue won’t recover, but once you move the plant, all new growth will be healthy.
Finding the Right Spot
The sweet spot is within 3–6 feet of an east- or north-facing window, or 4–6 feet from a south- or west-facing window filtered by a sheer curtain. If natural light is limited, a full-spectrum grow light on a 12–14 hour photoperiod works well as a supplement or replacement. A dedicated grow light such as the Soltech Aspect Grow Light provides the right spectrum without the heat of direct sun.
What Is Wrong with My Alocasia? It Might Be Pests
How to Inspect for Pests
Before treating, confirm what you’re dealing with. Flip every leaf and check the undersides — that’s where most pests hide, feed, and lay eggs. Do this weekly. Monthly, wipe the leaf surfaces with a damp cloth to remove dust and dislodge early colonies before they establish.
Spider Mites
Spider mites thrive in hot, dry air — exactly the conditions alocasias hate. Look for fine webbing on leaf undersides, a stippled or bronzed texture on the leaf surface, and tiny moving dots. Spray thoroughly with insecticidal soap or neem oil, focusing on undersides, every 5–7 days for 3–4 cycles. Raising humidity simultaneously makes the environment inhospitable to mites going forward. Bonide Insecticidal Soap Concentrate is a reliable ready-to-mix option.
Thrips, Mealybugs, and Scale
Thrips leave silvery streaking and distorted new growth, with tiny black fecal deposits on leaf surfaces. Isolate the plant immediately — thrips spread fast — and treat with neem oil plus yellow sticky traps.
Mealybugs appear as white cottony masses in leaf axils and along petioles. Dab individual colonies with 70% isopropyl alcohol on a cotton swab, then follow up with insecticidal soap spray over the whole plant.
Scale shows as brown or tan bumps on petioles and stems that don’t brush off easily. Scrub them off with a soft toothbrush dipped in isopropyl alcohol, then treat the whole plant with horticultural oil.
Fungus Gnats
The tiny flies themselves are mostly annoying, but their larvae feed on fine root hairs in moist soil, weakening an already stressed plant. Fix the root cause first: let the soil dry more between waterings. Add a layer of coarse sand or perlite to the soil surface to deter egg-laying, use yellow sticky traps to catch adults, and treat the soil with Bacillus thuringiensis var. israelensis (Bti) biological larvicide to kill larvae already present. Mosquito Bits by Summit Chemical is an effective and widely available Bti product.
Nutrient Deficiencies and Fertilizer Problems
Reading the Signs
The location of yellowing is your best clue. Nitrogen deficiency causes generalized yellowing of older leaves first. Magnesium deficiency shows as interveinal chlorosis — yellowing between the veins while the veins stay green — also on older leaves. Iron deficiency looks similar but appears on new leaves, because iron can’t be relocated within the plant. For magnesium deficiency, a monthly soil drench with Epsom salt (1 teaspoon per gallon of water) usually resolves it within a few weeks.
Over-Fertilizing
Excess soluble salts build up in the soil and create osmotic stress that pulls water out of root cells. Symptoms include brown leaf tips, white crusty deposits on the soil surface or pot rim, and wilting despite moist soil. Flush the soil by running plain water through the pot equal to 3–4 times its volume. If deposits are severe, repot with fresh mix entirely.
Fertilization Schedule
Use a balanced, water-soluble fertilizer at half the recommended strength every 2–4 weeks during spring and summer only. Stop feeding in autumn and winter when growth naturally slows. A 20-20-20 formula such as Jack’s Classic All Purpose Fertilizer is a reliable choice.
Alocasias also need a slightly acidic soil pH of 5.5–6.5. Outside this range, nutrients become chemically unavailable even if they’re physically present in the soil. Test with an inexpensive pH meter and amend with sulfur to lower pH or agricultural lime to raise it.
Temperature, Cold Drafts, and Dormancy
Cold Damage
Alocasias are comfortable between 65–85°F (18–29°C). Below 50°F (10°C), cellular damage occurs rapidly: leaves blacken, turn translucent, or collapse suddenly, and petioles go limp and dark. This happens without the foul smell of root rot, which helps distinguish the two. Cold drafts from single-pane windows, exterior doors, or HVAC vents can cause localized cold injury even when the rest of the room feels warm. Move the plant away from any cold air source and remove damaged leaves cleanly with sterile scissors.
Is My Alocasia Dead or Just Dormant?
This is one of the most common alocasia panics — and the answer is almost always “just dormant.” When temperatures drop or light levels decrease in autumn and winter, alocasias can redirect all their energy into their corms and drop every single leaf. It looks catastrophic.
The diagnostic is simple: dig gently into the soil and find the corm. Firm and solid = dormant and alive. Soft, mushy, and foul-smelling = rot. If the corm is healthy, your plant is fine.
Caring for a Dormant Alocasia
Move the pot to a cool but frost-free spot — above 55°F (13°C) — and water only once every 3–4 weeks, just enough to prevent the corm from desiccating completely. Don’t fertilize. When spring arrives and light levels increase, resume normal care and watch for new growth to emerge. Patience is the only tool required.
Transplant Shock
Wilting, yellowing, and leaf drop following a recent repot is transplant shock. Alocasias are particularly sensitive to root disturbance, and repotting into a pot that’s too large makes things worse — excess soil holds moisture the roots can’t absorb, increasing rot risk substantially. Place the plant in stable conditions, maintain consistent moderate moisture, and resist the urge to fertilize a stressed root system. New growth will resume once the plant settles in.
Prevention: The Ideal Alocasia Care Setup
Best Soil Mix
A well-draining, aerated mix prevents the majority of problems before they start. A reliable DIY blend:
- 40% peat-free potting mix or coco coir — structure and moisture retention
- 30% perlite — drainage and aeration
- 20% orchid bark — chunky material that mimics forest floor substrate
- 10% horticultural charcoal — helps prevent anaerobic pockets
Target a soil pH of 5.5–6.5.
Pot Selection and Watering
Always use pots with drainage holes. Terracotta is a smart choice if you tend to overwater, as it wicks moisture away from the soil. Never upsize by more than 1–2 inches in diameter when repotting. Check soil moisture before every watering session, use the lift test (a noticeably lighter pot means it’s ready), and use room-temperature filtered or rainwater when possible. Never let the pot sit in standing water for more than 30 minutes.
Quick-Reference Care Parameters
| Parameter | Ideal Range |
|---|---|
| Temperature | 65–85°F (18–29°C) |
| Relative Humidity | 60–80% |
| Light | Bright indirect (1,500–3,000 foot-candles) |
| Soil pH | 5.5–6.5 |
| Fertilization | Half-strength balanced feed, every 2–4 weeks (growing season only) |
Frequently Asked Questions
Why are my alocasia leaves turning yellow?
Yellowing most commonly points to overwatering, low light, or a nutrient deficiency. Check the soil first: if it’s wet, ease up on watering and inspect the roots for rot. If the soil is fine, consider whether the plant is getting enough bright indirect light and whether it’s been fed recently during the growing season.
Why does my alocasia have brown tips and crispy edges?
Brown, crispy tips and edges are almost always caused by low humidity, though underwatering and fluoride sensitivity from tap water can contribute. Raise humidity to 60–70% RH using a humidifier and switch to filtered or rainwater. Existing damage won’t reverse, but new leaves will emerge clean once conditions improve.
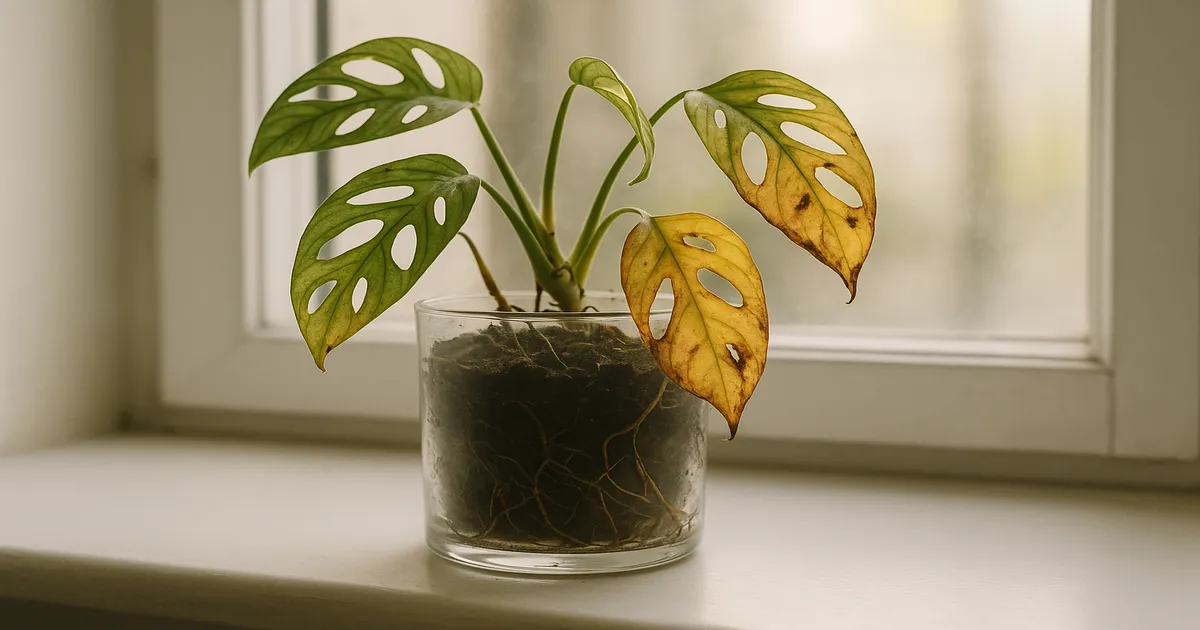
Why is my alocasia drooping even though the soil is moist?
Drooping in wet soil is a red flag for root rot. When roots are damaged by pathogens like Pythium or Phytophthora, they can no longer transport water to the leaves — so the plant wilts despite having plenty of moisture at its roots. Unpot the plant and inspect; if roots are brown, mushy, or smell bad, follow the root rot treatment steps above.
Is my alocasia dead or just dormant?
Gently expose the corm at the base of the plant and squeeze it lightly. A firm, solid corm means your plant is alive and dormant — it will regrow when conditions improve in spring. A soft, mushy corm with an unpleasant smell indicates rot, which requires immediate treatment or propagation of any healthy offsets.
How do I save an alocasia with root rot?
Remove the plant from its pot, trim all mushy roots with sterile scissors, and soak the remaining healthy roots in a diluted hydrogen peroxide solution (3% peroxide mixed 1:4 with water). Repot into fresh, well-draining mix in a clean pot with drainage holes, sized only 1–2 inches larger than the remaining root ball, and withhold watering for 3–5 days. Most alocasias recover well — and even if all foliage is lost, a healthy corm can still push out new growth.