Quick Answer: The most common reasons something is wrong with your pothos are overwatering, underwatering, incorrect light, low humidity, pests, or nutrient deficiency. Most problems show up as yellow leaves, brown tips, or wilting — and once you match the symptom to the cause, the fix is usually straightforward. Use the sections below to diagnose your plant fast.
What Is Wrong With My Pothos? The 10 Most Common Causes
Pothos are famously tough, but they do communicate distress — you just need to know the language. Here are the ten most common causes of pothos problems:
- Overwatering / root rot
- Underwatering / drought stress
- Too little light
- Too much direct sun
- Nutrient deficiency
- Pest infestation
- Temperature stress (cold drafts or heat)
- Low humidity
- Root-bound roots
- Disease or soil issues
Quick symptom-to-cause reference:
| Symptom | Most Likely Cause(s) |
|---|---|
| Yellow leaves (lower/older first) | Overwatering, nitrogen deficiency |
| Yellow leaves with green veins | Magnesium or iron deficiency |
| Brown, crispy tips | Underwatering, low humidity, fertilizer burn |
| Wilting with wet soil | Root rot, compacted soil |
| Wilting with dry soil | Underwatering, root-bound |
| Leggy stems, tiny leaves | Too little light |
| Bleached or scorched patches | Too much direct sun |
| White cottony clusters | Mealybugs |
| Fine webbing on leaves | Spider mites |
| Overnight black patches | Cold/chilling injury |
Start with your plant’s most obvious symptom and jump to that section. If your pothos has multiple symptoms at once, check overwatering first — it’s the most common culprit and triggers a cascade of secondary problems.
Yellowing Leaves: Overwatering, Root Rot, and Nutrient Deficiency
Overwatering and Root Rot
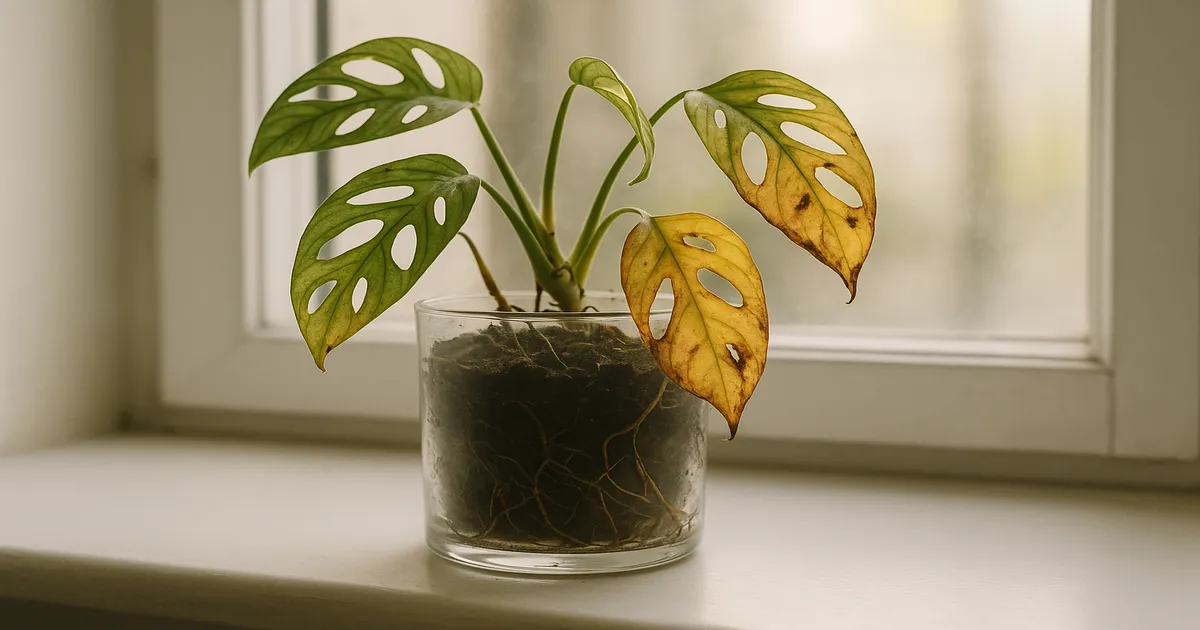
Yellow leaves are the most-reported pothos problem, and overwatering is the most common trigger. When soil stays saturated, the root zone becomes anaerobic — roots can’t breathe or absorb nutrients, and they quickly fall prey to pathogens like Phytophthora, Pythium, and Rhizoctonia solani. Root rot can kill a plant within days if left unchecked.
Signs that point to overwatering rather than another cause:
- Yellowing starts on lower or older leaves first
- Soil feels wet or soggy more than 10–14 days after watering
- The stem base looks dark, soft, or mushy
- Fungus gnats hover around the soil
Inspecting the roots: Unpot the plant and look directly at the roots. Healthy roots are white to tan and firm. Rotted roots are brown or black, soft, and may smell faintly sulfurous. If most roots are still white with only a few brown tips, the plant is very salvageable.
Step-by-step fix:
- Remove the plant from its pot and shake off old soil.
- Cut away all mushy, brown, or black roots with sterile scissors.
- Treat remaining roots with a diluted hydrogen peroxide solution (3% H₂O₂ mixed 1:4 with water), or dust cut surfaces with powdered cinnamon as a natural antifungal.
- Repot into a fresh, chunky aroid mix: roughly 40% potting mix, 30% perlite, 20% orchid bark, and 10% horticultural charcoal. Fox Farm Ocean Forest works well as the potting mix base.
- Use a terracotta pot — it wicks excess moisture and gives roots room to breathe.
Nitrogen and Magnesium Deficiency
Not all yellowing is about water. If soil moisture seems fine, nutrients may be the issue.
- Nitrogen deficiency causes uniform pale yellowing on older leaves first. Nitrogen is mobile in the plant, so it gets pulled from old tissue to feed new growth.
- Magnesium deficiency shows as interveinal chlorosis — the leaf turns yellow while the veins stay green. Magnesium is the central atom in the chlorophyll molecule, so without it, color fades between the veins.
- Iron deficiency looks similar to magnesium deficiency but appears on new leaves first. It’s usually caused by soil pH rising above 7.0, which locks iron into insoluble forms.
For general deficiencies, feed with a balanced fertilizer such as Jack’s Classic All Purpose 20-20-20 at half strength once a month during spring and summer. For magnesium specifically, drench the soil with 1 teaspoon of Epsom salt per gallon of water once a month — but don’t overdo it, as excess magnesium can interfere with calcium uptake.
Brown Tips and Crispy Leaves: Underwatering, Humidity, and Fertilizer Burn
Underwatering and Drought Stress
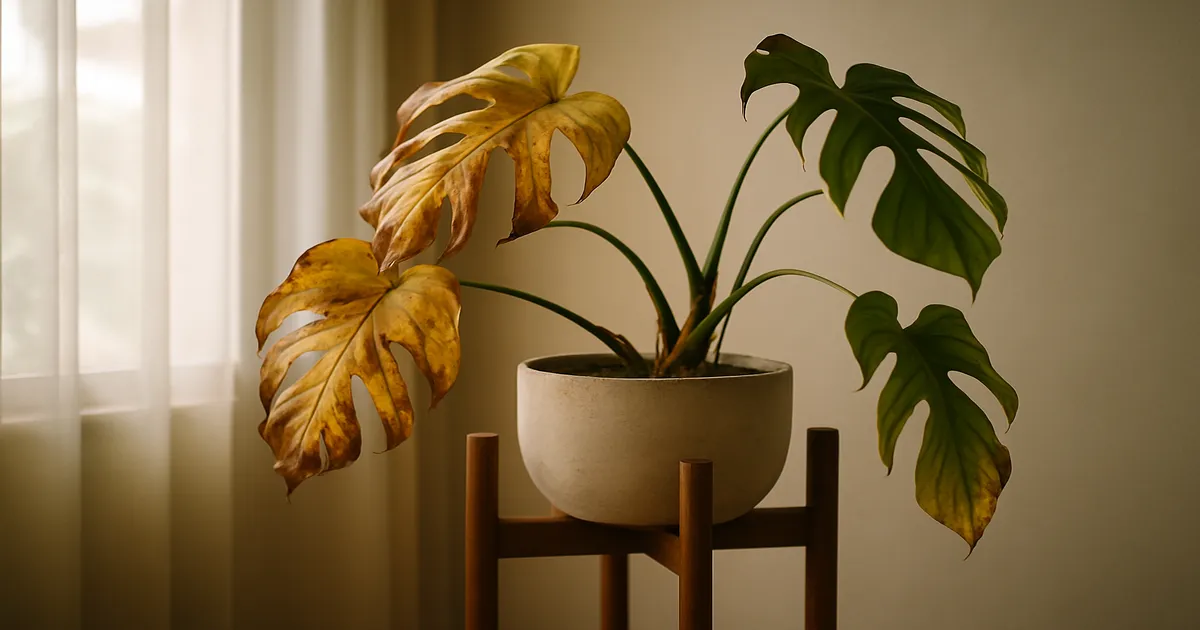
Brown, crispy leaf tips feel very different from the soft, yellow leaves of an overwatered plant. With underwatering, leaves turn papery and thin, curl inward to reduce water loss, and the soil pulls away from the pot edges — bone dry and often hydrophobic, meaning water runs straight through without absorbing.
Pothos store some water in their thick stems, but they aren’t succulents. Prolonged drought causes irreversible cell damage, so don’t wait until the whole plant is drooping.
Rehydrating severely dry soil: If the soil has become hydrophobic, top-watering won’t work — water just channels down the gap between the rootball and the pot wall.
- Place the pot in a basin of room-temperature water for 20–30 minutes (bottom-watering).
- Add a single drop of liquid dish soap to break surface tension and help dry soil absorb moisture.
- Gently aerate the soil with a chopstick before watering if it’s very compacted.
Low Humidity
Pothos prefer 50–70% relative humidity. In winter, central heating can push indoor humidity below 30%, and the leaf tips — the furthest point from the plant’s vascular supply — dry out first. Leaves may also look dull rather than glossy, and spider mites (which love dry air) become more likely.
Practical ways to raise humidity:
- Set the pot on a pebble tray filled with water, with the pot sitting above, not in, the water
- Group plants together — they collectively raise the humidity around them
- Run a small humidifier nearby, such as the Levoit Classic 300S
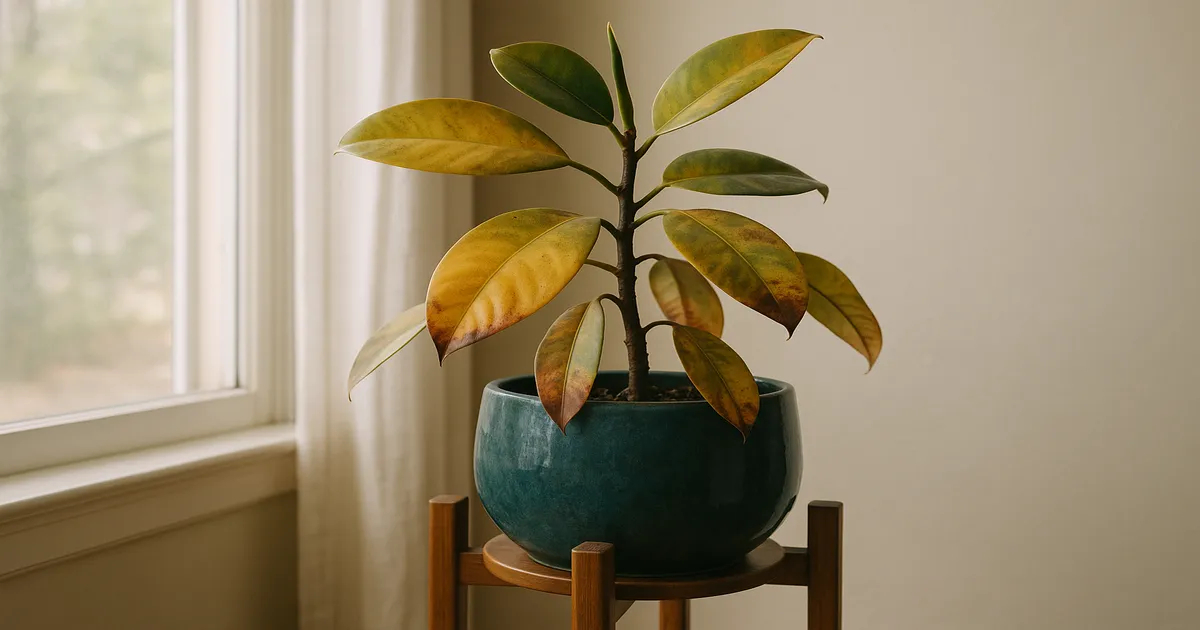
Fertilizer Salt Burn
Over-fertilizing raises osmotic pressure in the soil, which pulls moisture out of roots — essentially dehydrating the plant from the inside. You’ll see brown, crispy margins (not just tips) and often a white crusty deposit on the soil surface or the outside of clay pots.
The fix is a thorough flush: slowly pour plain water through the drainage holes using three to four times the pot’s volume. This dissolves and drains accumulated salts. Scrape off any white crust from the soil surface first.
What Is Wrong With My Pothos When It Wilts? Reading the Soil First
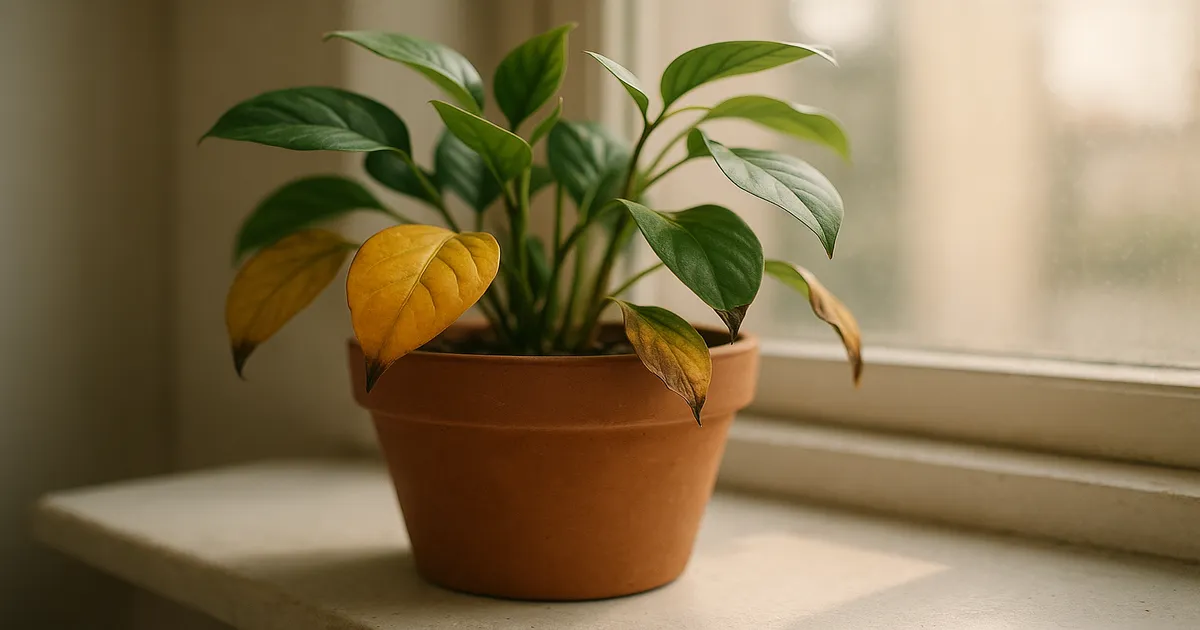
Paradoxical Wilting: Wet Soil, Drooping Leaves
This is the one that tricks most people. The plant looks desperately thirsty, so you reach for the watering can — but the soil is already soaked. This is paradoxical wilting, and adding more water will make it worse. Damaged roots simply can’t transport water to the leaves, no matter how much is available. Always check soil moisture before watering a wilting pothos.
Drought Wilting vs. Heat Stress Wilting
These two look similar but have different causes:
- Drought wilting: Soil is dry, leaves feel papery, and the whole plant sags uniformly.
- Heat stress wilting: Soil is moist, but the plant droops only during the hottest part of the afternoon (usually when temperatures exceed 90°F / 32°C). Stomata close to prevent water loss, temporarily shutting the plant down. It often perks back up in the evening on its own.
Move the plant away from south-facing windows or heat vents during summer if you notice this pattern.
Root-Bound Plants
A root-bound pothos runs out of soil to hold water, so the tiny amount of substrate dries out within a day or two of watering. Signs include roots spiraling out of drainage holes, a rootball that holds the exact shape of the pot when removed, and stunted growth despite good care.
Repot into a container that’s 1–2 inches larger in diameter — no bigger. An oversized pot holds too much moisture and invites rot. Expect some temporary wilting for one to three weeks after repotting as roots re-establish; this is normal.
Light Problems: Leggy Growth, Faded Color, and Leaf Scorch
Too Little Light
In low light (below about 150 foot-candles), photosynthesis drops below the plant’s compensation point — it’s spending more energy than it’s making. The plant responds by stretching toward any available light source, producing long, weak stems with wide gaps between leaves and smaller-than-normal new growth.
Variegated cultivars like Marble Queen, N’Joy, and Manjula are especially vulnerable. Their white and cream leaf sections contain no chlorophyll, so they can’t photosynthesize. In low light, the plant gradually produces more solid-green leaves to maximize energy capture — a process called reversion. To maintain variegation, these cultivars need bright indirect light (1,500–3,000 foot-candles).
One easy, often-overlooked fix: wipe dusty leaves with a damp cloth. A layer of dust can reduce light absorption by up to 30%.
Too Much Direct Sun
Direct sun above roughly 3,500 foot-candles destroys chlorophyll faster than the plant can replace it. The result is photooxidative damage: irregular bleached or white patches, usually on the side of the leaf facing the light. This is distinct from natural variegation, which follows consistent patterns. Move the plant back from the window or add a sheer curtain to diffuse the light.
Light Requirements by Cultivar
- Golden Pothos: Tolerates low to bright indirect light — the most adaptable cultivar
- Neon Pothos: Does well in medium to bright indirect light; solid green so less sensitive than variegated types
- Marble Queen / Manjula / N’Joy: Require bright indirect light (1,500–3,000 foot-candles) to maintain variegation
- Cebu Blue: Prefers bright indirect light for best leaf development
If your space lacks a bright window, a full-spectrum grow light delivering 2,000–4,000 lux at the plant canopy works well — run it 12–14 hours per day on a timer. The Soltech Aspect is a popular option that blends into home décor.
Pothos Pests: Identification and Treatment
Fungus Gnats
The tiny flies hovering around your soil are annoying but mostly harmless. The real damage comes from their larvae, which live in the top 2–3 inches of moist soil and feed on root hairs, opening wounds for pathogens. Fungus gnats are almost always a sign of consistently overwatered soil.
- Let the soil dry out more between waterings — larvae can’t survive in dry conditions
- Apply a top dressing of coarse perlite or diatomaceous earth to deter egg-laying
- Use yellow sticky traps to catch adults
- Drench the soil with Bacillus thuringiensis var. israelensis (Bti), sold as Mosquito Bits, to kill larvae without harming plants or beneficial insects
Mealybugs
Mealybugs look like tiny tufts of white cotton tucked into leaf axils and along stems. They feed on phloem sap and excrete sticky honeydew, which can lead to sooty mold. Catch them early — a heavy infestation is much harder to clear.
- Dab individual bugs with a cotton swab dipped in isopropyl alcohol
- Spray the whole plant with insecticidal soap, coating leaf undersides thoroughly
- Repeat every 5–7 days for at least three cycles to break the egg cycle
Spider Mites
Spider mites thrive when humidity drops below 40%. You’ll notice fine stippling (tiny yellow dots) on leaves and, in heavier infestations, delicate webbing between stems. A strong blast of water in the shower knocks mites off the plant and is a great first step. Follow up with neem oil spray and raise the humidity to make conditions less hospitable.
Scale and Thrips
Scale appears as small brown or waxy bumps along stems and leaf midribs. Scrape them off with a soft toothbrush dipped in rubbing alcohol, then treat with horticultural oil.
Thrips rasp leaf surfaces, leaving silver or bronze streaking and distorted new growth with tiny black fecal specks on the underside. Spinosad or neem oil applied weekly for several weeks is the most effective treatment.
Prevention tip: Always quarantine new plants for 2–3 weeks before placing them near your other houseplants, and check leaf undersides during regular watering. Catching pests early — when there are just a few — means a cotton swab and some patience is usually all you need.
Temperature, Disease, and Other Hidden Causes
Cold Drafts and Chilling Injury
Pothos have no cold-hardening mechanism. When temperatures drop below 55°F (13°C), cell membranes lose fluidity and ion transport breaks down. The result is sudden dark brown or black water-soaked patches that often appear overnight. Common culprits are air conditioning vents blowing directly on the plant, cold windowsills in winter, and proximity to exterior doors. Move the plant and trim the damaged leaves; if the stem is still firm and green, the plant will likely recover.
Bacterial and Fungal Disease
Bacterial leaf spot (Erwinia and Pseudomonas species) enters through wounds or water pores at leaf margins. Look for water-soaked, dark lesions that spread rapidly, often with a yellow halo and sometimes a foul odor.
- Remove all affected leaves and stems with sterile tools
- Improve airflow around the plant
- Avoid wetting the leaves when watering
- Apply a copper-based bactericide to slow the spread
Pothos Mosaic Virus
Pothos Mosaic Virus (PoMV) causes a mosaic pattern of light and dark green on leaves along with puckering and distortion. It looks similar to variegation, but the pattern is irregular and the leaves are deformed. It spreads through aphids and unsterilized cutting tools, and there is no treatment. Isolate the plant immediately and discard it to protect your other plants.
Soil pH and Compaction
Pothos prefer a soil pH of 6.1–6.8. Above 7.0, iron and other micronutrients become insoluble even if they’re physically present in the soil. Below 5.5, manganese and aluminum can reach toxic levels. A soil pH meter can rule this out quickly. Standard potting mixes also compact over time, reducing aeration and creating the anaerobic conditions that fuel root rot. Refreshing the soil every one to two years with a chunky aroid mix prevents this from becoming a silent problem.
Pothos Problem Prevention: A Simple Care Routine
The single most effective thing you can do is water based on soil moisture, not a fixed schedule. Push your finger 1–2 inches into the soil — if it feels dry at that depth, water thoroughly until it drains from the bottom. If it’s still damp, wait a few more days. A moisture meter removes the guesswork entirely: water when the reading hits 3–4 on a standard 1–10 scale.
Beyond watering, keep your pothos in bright indirect light, maintain temperatures between 65–85°F (18–29°C), and feed monthly during spring and summer. Check leaf undersides every time you water. Most problems with pothos are caught and corrected easily when you spot them early.
Frequently Asked Questions
Why are my pothos leaves turning yellow? The most common cause is overwatering. Check that the soil isn’t staying wet for more than 10–14 days after watering. If moisture isn’t the issue, consider a nutrient deficiency — nitrogen causes uniform yellowing on older leaves, while magnesium deficiency causes yellowing between the veins.
Why does my pothos have brown tips? Brown, crispy tips usually point to underwatering, low humidity (below 40%), or fertilizer salt buildup. Check the soil moisture first, then consider whether the air in your home is very dry, especially in winter.
Can a pothos recover from root rot? Yes, if caught early enough. Unpot the plant, cut away all mushy roots, treat with diluted hydrogen peroxide, and repot into fresh, well-draining soil. As long as some healthy white roots remain, the plant has a good chance of recovery.
Why is my pothos wilting even though the soil is wet? This is paradoxical wilting caused by root rot. Damaged roots can’t transport water to the leaves regardless of how much is in the soil. Adding more water will make things worse — follow the root rot treatment steps above.
Why is my variegated pothos losing its white markings? Reversion to solid green happens when the plant doesn’t get enough light. The white and cream sections of variegated leaves contain no chlorophyll, so in low light the plant produces more all-green leaves to capture more energy. Move the plant to a spot with bright indirect light (1,500–3,000 foot-candles) to restore variegation on new growth.