Quick Answer: Chop off a leaf when it has lost more than 50% of its functional green tissue and is costing the plant more energy than it produces. For disease or pest damage, remove it immediately to stop the spread. For stress-related yellowing — overwatering, nutrient deficiency, cold shock — fix the root cause first, then prune.
Knowing exactly when to chop off a leaf is one of the most practical skills you can develop as a plant parent. Cut too early and you rob the plant of photosynthesis it desperately needs. Cut too late and you leave a diseased or rotting leaf that actively harms the rest of the plant. This guide walks through every common scenario so you can make the right call every time.
When Should You Chop Off a Leaf? The Core Decision Framework
The 50% Rule
The simplest rule: if a leaf has lost more than roughly 50% of its functional green tissue, it’s time to remove it. Below that threshold, the leaf is still earning its keep. Above it, the plant is spending more energy maintaining that leaf than the leaf returns through photosynthesis.
There are exceptions. Diseased leaves should go immediately regardless of how much green remains. Nutrient-deficient leaves should stay until you’ve corrected the deficiency. But the 50% rule covers the majority of everyday situations.
Source vs. Sink: The Science in Plain Terms
In plant physiology, a source leaf exports sugars to the rest of the plant; a sink imports them. Young expanding leaves start as sinks, then become sources once fully mature. A badly damaged, heavily shaded, or deeply senescing leaf flips back to sink status — it consumes more carbohydrates through respiration than it generates through photosynthesis. Removing it redirects those resources to healthy growth.
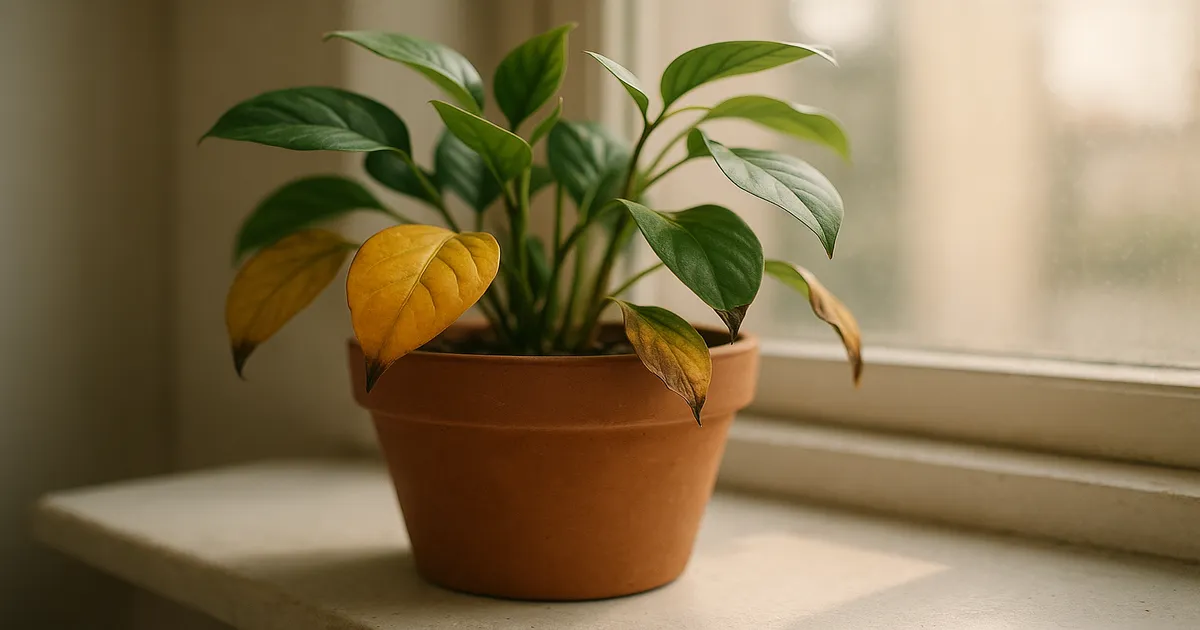
Natural Leaf Senescence: When Yellowing Is Normal
Signs It’s Just Old Age
Leaf senescence isn’t a failure — it’s a feature. As a leaf ages, rising levels of ethylene and abscisic acid (ABA) trigger an orderly breakdown of chlorophyll. Before the leaf drops, the plant actively reclaims nitrogen, phosphorus, and potassium, shipping them back into the stem for reuse.
You’re looking at normal senescence — not a problem — when all of these apply:
- Location: The oldest, lowest leaves yellow first
- Pattern: Uniform yellowing from tip or base inward, with no spots or mushy patches
- Texture: The leaf gradually becomes papery and dry, not wet or slimy
- Smell: No foul odour from the soil
When to Remove a Senescing Leaf
Wait until the leaf is at least 70–80% yellow or brown. At that point the plant has reclaimed most of its nutrients and the leaf is genuinely done. Cut at the petiole base with sterilised scissors, leaving a 1–2 cm stub — it will dry and fall away cleanly on its own. Never tear a leaf off; tearing damages the vascular tissue around the node.
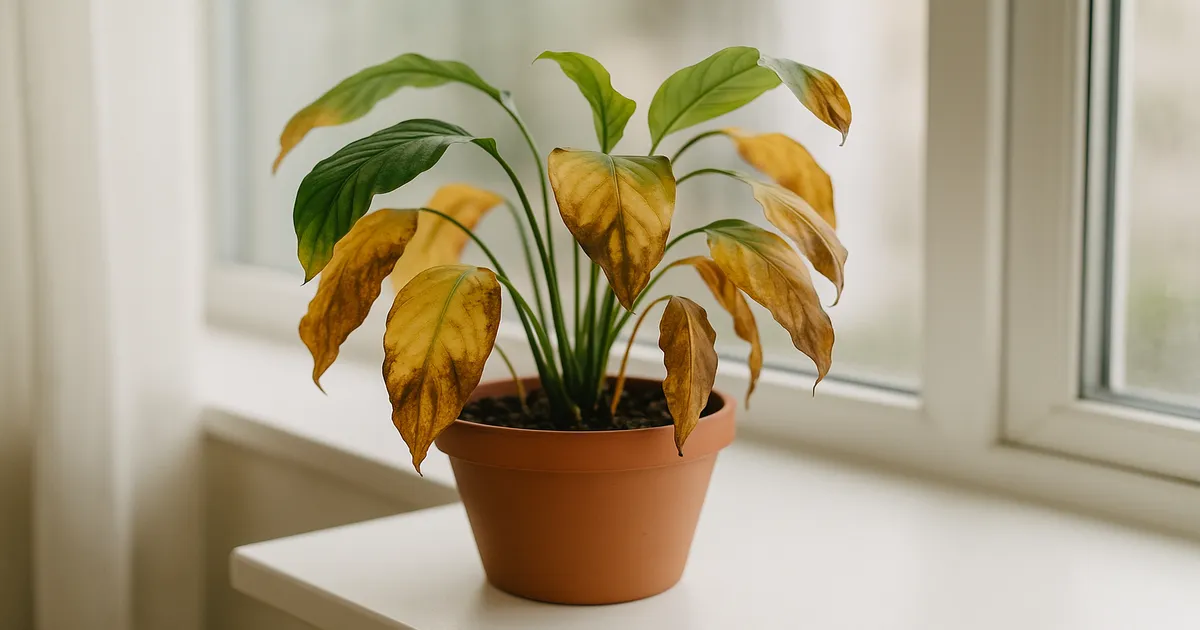
Overwatering, Root Rot & Underwatering: Stress Leaves
Overwatering and Root Rot
Overwatered leaves feel soft and may be slimy at the petiole base. Yellowing often appears in the mid-canopy rather than just the oldest leaves, and the soil smells sour or musty. This is your cue to investigate the roots, not to start pruning.
Root rot (Pythium, Phytophthora, Fusarium) destroys the roots’ ability to absorb water and nutrients — the leaves are just the messenger. Removing them before you fix the roots achieves nothing. The plant needs every photosynthesising cell it can get during recovery. Unpot, trim black mushy roots back to healthy white tissue, dust cuts with cinnamon, and repot into a well-draining mix: 40–50% peat-free potting compost, 30–40% perlite, and 20% orchid bark. A good-quality horticultural perlite such as Espoma Organic Perlite improves drainage without compacting over time. Follow up with a soil drench of 3% hydrogen peroxide diluted 1:4 with water to oxygenate the root zone and suppress anaerobic pathogens.
Recovery steps:
- Unpot and inspect roots; trim all black or mushy roots
- Dust cut ends with cinnamon or powdered sulfur
- Repot into a fast-draining mix with 30–40% perlite
- Drench soil with diluted hydrogen peroxide (3% concentration, 1:4 with water)
- Remove only fully dead leaves; leave yellowing-but-intact leaves in place
Underwatering
Drought stress shows up at the leaf tips and margins first — the areas furthest from the vascular supply. Leaves curl inward, the pot feels feather-light, and the soil may be pulling away from the pot edges. Bottom-water the plant by sitting the pot in a tray of water for 20–30 minutes. A soil moisture meter such as the XLUX Soil Moisture Meter takes the guesswork out of watering schedules and helps prevent both extremes.
Recovery steps:
- Bottom-water thoroughly for 20–30 minutes
- Trim only the crispy brown tissue — cut just into the dead area, following the leaf’s natural outline
- Amend soil with coco coir to improve moisture retention going forward
Pest Infestations: Which Leaves to Remove and Which to Treat
Damage Patterns by Pest
Each pest has a distinctive calling card:
- Spider mites: Fine stippling (tiny pale dots), bronzing, and delicate webbing on leaf undersides
- Mealybugs: White cottony clusters in leaf axils; new growth appears distorted and curled
- Scale insects: Waxy brown bumps on stems; sticky honeydew leads to black sooty mould that blocks light
- Thrips: Silver streaking across the leaf surface; leaves look scratched and may be distorted
Leaves with more than 50% damage, or any leaf carrying visible egg masses, should be removed immediately and sealed in a plastic bag before disposal. Do not compost them. Mildly infested leaves with less than 50% damage are better treated in place — removing them unnecessarily reduces photosynthetic capacity.
Treatment Protocol for Remaining Foliage
- Insecticidal soap (potassium salts of fatty acids): spray every 5–7 days for three consecutive cycles
- Neem oil (cold-pressed, 2–3 ml per litre of water): apply in the evening to avoid photodamage; disrupts insect hormone systems
- Diatomaceous earth (food-grade): dust on the soil surface to target crawling insects and fungus gnat larvae
- Systemic granules (imidacloprid-based): for severe infestations, water into the soil so roots absorb the active ingredient
Isolate the affected plant immediately and keep humidity below 60% to slow pest reproduction.
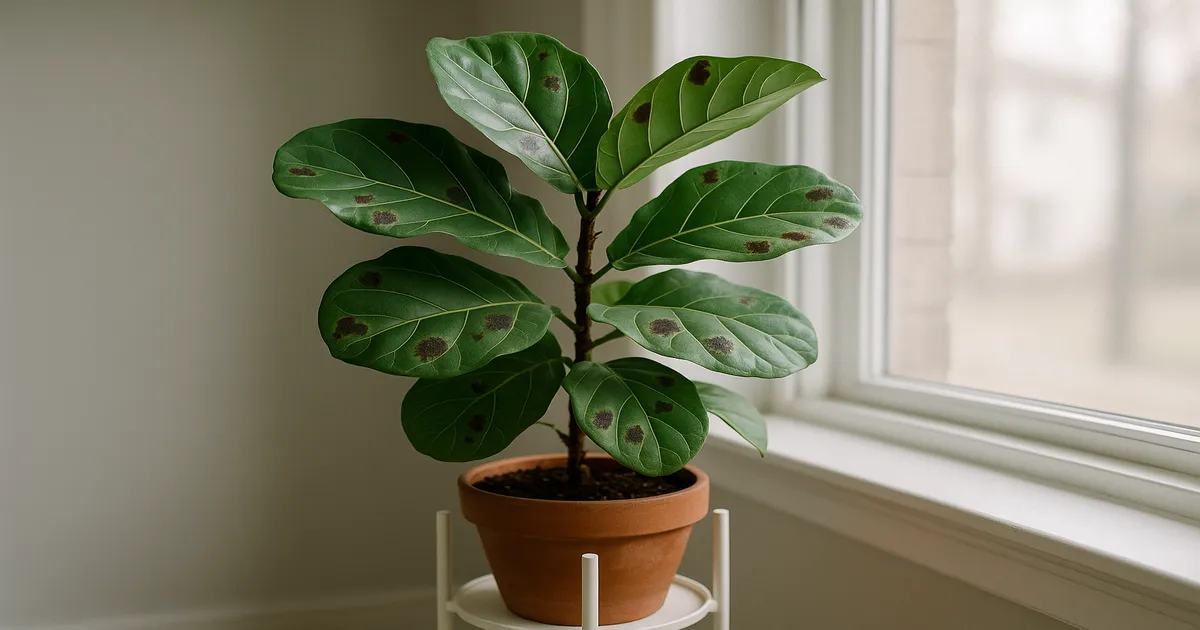
Fungal & Bacterial Diseases: When to Chop Off a Leaf Immediately
Identifying Common Diseases
- Cercospora / Xanthomonas leaf spot: Circular or irregular brown spots with a distinct yellow halo
- Botrytis (grey mould): Fuzzy grey growth on dying tissue; thrives in cool, damp, stagnant air
- Anthracnose: Dark lesions with concentric rings, often starting at leaf tips
- Bacterial blight: Water-soaked, translucent patches that turn brown-black rapidly
Remove at the first sign of spreading lesions — don’t wait. A single diseased leaf left in place dramatically increases the inoculum load, meaning more spores or bacteria are available to infect healthy tissue. After removal, apply a copper-based fungicide to the remaining foliage as a preventive measure.
Sterilise your cutting tool between every single cut — dip in 70% isopropyl alcohol or a 10% bleach solution and wipe dry. For Botrytis specifically, reduce ambient humidity below 50% and water in the morning so foliage dries completely before evening.
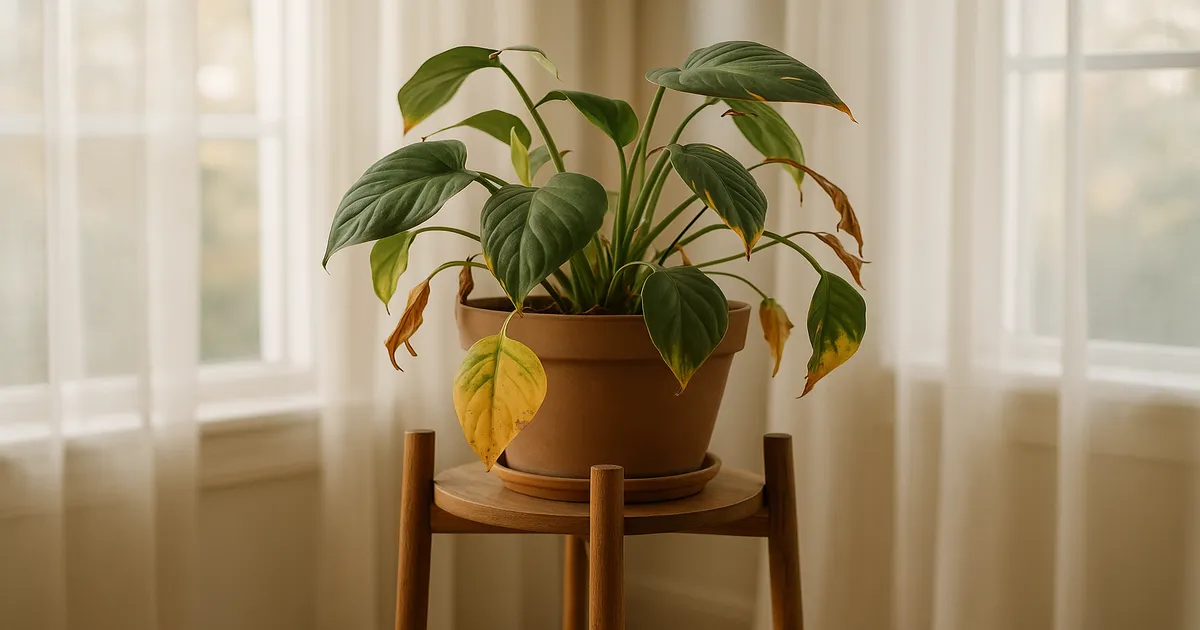
Nutrient Deficiencies & Light Stress: Don’t Cut Too Soon
Reading the Deficiency Map
Mobile nutrients (nitrogen, potassium, magnesium) show deficiency symptoms on the oldest leaves first — the plant cannibalises old foliage to feed new growth. Immobile nutrients (iron, manganese, calcium) show symptoms on newest leaves first, because they can’t move within the plant.
A yellowing leaf caused by nutrient deficiency is actively being scavenged. Cut it off and those nutrients are lost. Instead, correct the root cause — most nutrient lockout happens when soil pH drifts outside 5.5–6.5. Test with a digital pH meter, flush the soil if salt build-up is suspected, and apply a balanced liquid fertiliser or chelated micronutrient foliar spray. Remove symptomatic leaves only after new healthy growth confirms recovery.
Sunscald vs. Low-Light Etiolation
Sunscald creates large, dry, papery dead patches. If more than 40% of the blade is affected, remove the leaf. Etiolation (too little light) produces pale, thin, stretched leaves that are still technically functional — leave them in place until you’ve corrected the light situation, then let the plant shed them naturally as new growth takes over. Supplement low light with a full-spectrum LED grow light at 5,000–6,500K, positioned 15–30 cm above the canopy for 12–14 hours per day.
Physical Damage, Cold Injury & Special Plant Groups
Torn or Crushed Leaves
Plants can’t regenerate damaged tissue the way animals heal wounds — they compartmentalise injury instead (the CODIT model). A tear covering more than 30–40% of the blade, or any wound showing signs of pathogen entry (darkening, water-soaked edges), warrants full removal. Smaller tears can be trimmed neatly with sterile scissors following the leaf’s natural outline.
Cold Damage: Wait Before You Cut
Cold-damaged tissue turns water-soaked and translucent, then collapses to black. The temptation is to cut immediately, but the boundary between live and dead tissue isn’t clear until 48–72 hours after the cold event. Wait, then cut back to healthy green tissue. Keep the plant above 15°C (59°F) in the meantime.
Special Cases
Orchids: Leaves function as energy stores for blooming. Only remove an orchid leaf when it is fully dead — premature removal can abort a flower spike.
Palms: Green-to-yellow fronds are still translocating nutrients back to the trunk. Wait until a frond is fully brown before removing it.
Succulents: Leaves store water, so timing matters more than with most plants. Remove only fully desiccated or clearly diseased leaves.
Variegated plants: White or cream leaf sectors contain no chlorophyll. A leaf that is predominantly white or cream (such as on Monstera ‘Albo Variegata’) is almost certainly a net energy sink and is a legitimate removal candidate, especially when the plant is under stress.
How to Remove a Leaf Correctly
Tools and Technique
Use sharp scissors or snips for soft-stemmed plants (pothos, philodendron, ferns). For woody or thick-stemmed plants, bypass pruning shears give a cleaner cut than anvil-style pruners. Sterilise with 70% isopropyl alcohol before your first cut and between every subsequent cut, wiping the blade dry before cutting.
Cut at the base of the petiole, leaving a 1–2 cm stub. Never pull or tear — tearing rips the vascular tissue and leaves a ragged wound that’s slow to seal. For large wounds on thick-stemmed plants, apply a thin layer of horticultural wax or a dusting of cinnamon powder to deter pathogen entry.
Aftercare
- Seal diseased or pest-infested leaves in a plastic bag and bin them — never compost
- Healthy senesced leaves are fine for the compost heap
- Monitor the plant for new symptoms over the following two weeks
- Adjust watering, light, humidity, or fertiliser to address the underlying cause
Frequently Asked Questions
Should I cut off yellow leaves or leave them on the plant?
It depends on why they’re yellow. A uniformly yellowing lower leaf that’s nearly papery is senescing naturally — wait until it’s 70–80% yellow, then cut. A yellow leaf caused by overwatering, nutrient deficiency, or pest damage should stay until you’ve fixed the underlying problem, since the plant is still extracting value from it.
Does removing dead leaves help a plant grow?
Yes, in most cases. Fully dead leaves are net energy drains, and removing them redirects resources toward healthy foliage and new growth. The caveat: don’t remove leaves that are still partially green and functional, especially during recovery from stress or disease.
Can cutting off a leaf kill a plant?
Unlikely if done correctly, but aggressive over-pruning can cause real stress. Removing too many leaves at once strips the plant of photosynthetic capacity — a particular risk for slow-growing species like orchids or succulents. As a general rule, never remove more than 20–25% of a plant’s foliage in a single session.
Should I cut brown tips off leaves or remove the whole leaf?
Trim just the brown tips — cut slightly into the dead tissue following the natural leaf shape, leaving as much green as possible. Only remove the whole leaf if the majority of it is dead or if it shows signs of disease.
When should you NOT chop off a leaf from a houseplant?
Hold off when the leaf is yellowing due to a nutrient deficiency (the plant is actively scavenging it), when the plant is recovering from root rot (it needs every photosynthesising cell), immediately after cold damage (wait 48–72 hours to see the true damage boundary), and when a leaf is etiolated but still green (fix the light first). Removing leaves in these situations does more harm than good.