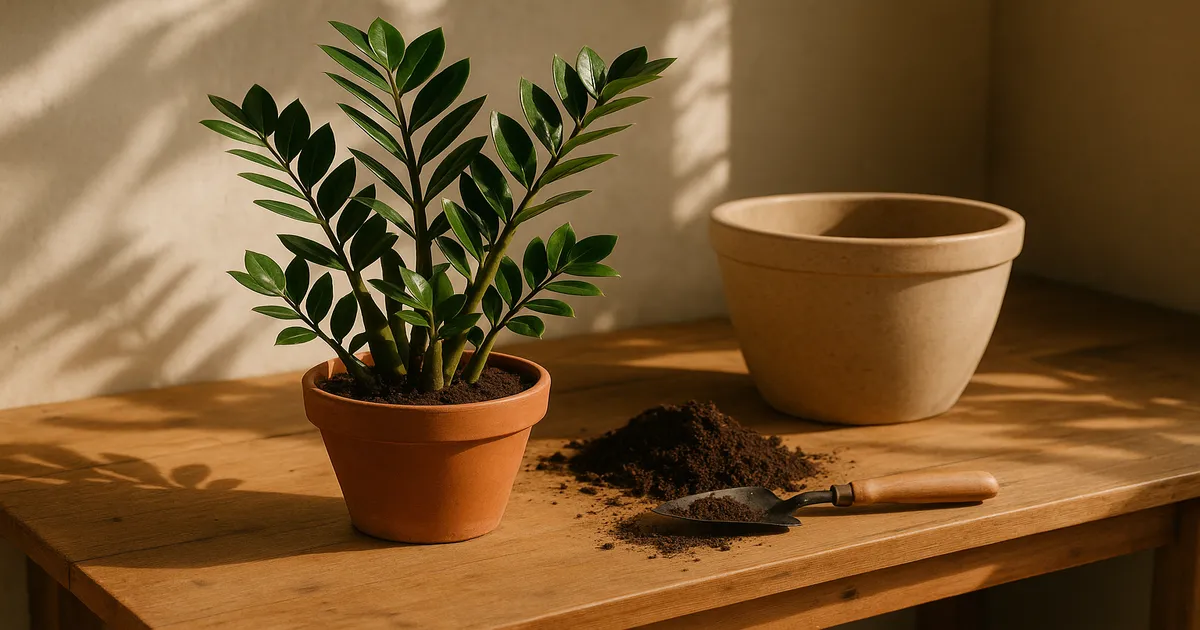
Quick Answer: Repot your ZZ plant every 2–3 years in spring or early summer, or sooner if you spot bulging pots, roots escaping drainage holes, or water rushing straight through without absorbing. ZZ plants prefer being slightly pot-tight, so there’s no need to rush — but when the signs appear, act on them. Always wear gloves when handling ZZ plants, as all parts contain irritating calcium oxalate crystals.
Figuring out when to repot a ZZ plant trips up a lot of owners because this plant is so good at looking fine even when it’s seriously cramped. The slow above-ground growth lulls you into thinking nothing’s happening underground — but the rhizomes tell a very different story.
Understanding ZZ Plant Biology Before You Repot
ZZ plants (Zamioculcas zamiifolia) grow from thick, potato-like underground storage organs called rhizomes. These store water, starch, and nutrients, which is why ZZ plants shrug off drought so easily. But rhizomes also expand laterally and multiply over time, and that underground activity drives your repotting schedule far more than whatever’s happening above the soil line.
As the plant matures, new rhizome offshoots develop at the base of existing ones. Each needs lateral space. When they run out of room, they start stacking vertically, compressing the root zone and eventually pressing hard enough against plastic pots to visibly warp or crack them.
How Fast Do ZZ Plants Grow — and Does Your Cultivar Affect Timing?
Under good conditions, ZZ plants put on roughly 6–12 inches of new growth per year. That’s slow by most houseplant standards, but rhizomes can fill a pot faster than the stems suggest. Root and rhizome growth peaks in spring and summer, which is why that’s the best window for repotting.
Cultivar matters here. ‘Raven’ grows a bit slower than the standard species and can comfortably go 3–4 years between repots. ‘Zenzi’ is a naturally compact dwarf that needs even less frequent attention. ‘Lucky Classic’ follows the standard 2–3 year timeline.
One more thing worth knowing: being slightly pot-tight actually stimulates rhizome development in ZZ plants. A mildly snug pot isn’t a problem — it’s a preference. The mistake is assuming that means you can ignore repotting indefinitely. Once rhizomes start deforming the pot or soil drainage collapses, the plant has crossed from comfortably snug into genuinely stressed.
7 Signs Your ZZ Plant Needs Repotting
1. The Pot Is Bulging, Cracking, or Deforming
This is the most dramatic sign. When you can see or feel the pot walls bowing outward, or find cracks forming in a plastic nursery container, the rhizomes are pressing with real force. Squeeze the sides of a plastic pot every six months — increasing firmness over time is a reliable early indicator.
2. Roots or Rhizomes Are Escaping Through Drainage Holes
Roots grow toward moisture and follow the path of least resistance. When they emerge from drainage holes, the existing soil volume has been fully colonized and the plant is hunting for more. One thin root poking out is an early warning. Multiple thick roots or rhizome tips emerging? That’s urgent.
3. Water Runs Straight Through Without Being Absorbed
If you water and it drains to the saucer in seconds, the soil has lost its ability to hold moisture. Two things cause this: the rhizome mass has physically displaced most of the soil, and the organic matter in the potting mix has broken down, collapsing the pore structure that retains water. The result is a plant that dries out in 2–3 days instead of the usual 7–10.
4. Growth Has Stalled During Spring and Summer
A ZZ that produces no new stems or leaflets from spring through midsummer — despite good light, consistent watering, and regular feeding — may be hitting a wall. Severely compacted rhizomes experience mechanical impedance: the pot walls and compressed soil physically resist cell expansion, pushing the plant into survival mode. Zero growth in fall and winter is completely normal, so only flag stalled growth as a repotting signal during the active growing season.
5. Soil Is Degraded, Crusty, or Pulling Away from the Pot Edges
Potting mix breaks down over time. Organic components decompose, the medium compacts, and mineral salts from tap water and fertilizers accumulate on the soil surface as a white crust. When soil pulls away from the pot edges, it has gone hydrophobic — water rolls off rather than soaking in. Even without other symptoms, soil older than 2–3 years is reason enough to repot.
6. Root Rot — an Emergency Repotting Situation
Mushy blackened stems at the base, rapid yellowing spreading upward, and a foul smell from the soil are all red flags. Root rot — caused by pathogens like Pythium or Phytophthora thriving in waterlogged, oxygen-depleted soil — requires immediate action. Don’t wait for a better season.
7. Soil-Dwelling Pests Require Root Zone Treatment
Fungus gnats and root mealybugs can’t be fully beaten with surface treatments alone. Fungus gnat larvae damage root hairs from below; root mealybugs colonize the rhizomes themselves. If you’re dealing with either, repotting into fresh sterile medium is part of the fix, not optional.
When to Repot a ZZ Plant: Timing by Season
Spring and Early Summer Are Ideal
Repotting in spring or early summer gives the plant the best shot at a smooth recovery. Root and rhizome growth peaks during this window, so the plant actively pushes into fresh soil rather than sitting dormant in it. New roots establish faster, transplant stress is shorter-lived, and the risk of soil staying wet too long is lower when the plant is actively growing.
Fall and Winter Repotting
It’s not ideal. Growth slows significantly in cooler months, which means roots establish slowly and fresh soil stays moist for longer — increasing rot risk. If your ZZ is healthy and the repotting isn’t urgent, wait until spring.
Emergency Repotting: When Timing Doesn’t Matter
Root rot, severe pest infestation, or a cracked pot aren’t problems you schedule around. If the plant is in genuine distress, repot immediately regardless of the season. A stressed plant repotted in November is better off than a dying plant left until March.
Choosing the Right Pot and Soil Mix
Pot Size: Why Going Too Big Is a Mistake
Size up by just 1–2 inches in diameter — for example, from a 6-inch pot to an 8-inch pot. A pot that’s too large holds excess soil the roots can’t draw moisture from, and that persistently wet soil is where rot begins.
Pot material matters too:
- Terracotta dries out faster thanks to its porous walls, making it a good choice if you tend to overwater. The downside: expanding rhizomes can crack terracotta, so check for hairline fractures regularly.
- Plastic and glazed ceramic retain moisture longer, which suits drier environments or owners who lean toward underwatering.
- Whatever material you choose, at least one drainage hole is non-negotiable.
The Ideal Soil Mix for ZZ Plants
Skip bagged “tropical plant” mixes and make your own — it takes two minutes and makes a real difference.
DIY ZZ plant mix:
- 40–50% quality potting mix (peat- or coco coir-based)
- 25–30% perlite
- 15–20% coarse horticultural sand or pumice
- Optional: 5–10% orchid bark for extra aeration
Target a soil pH of 6.0–7.0. Avoid garden soil (too dense, potential pathogens) and pure peat (goes hydrophobic when dry). If you want to verify your pH, an affordable meter like the Apera Instruments AI209 takes the guesswork out of it.
How to Repot a ZZ Plant: Step by Step
What You’ll Need
- New pot (1–2 inches larger in diameter)
- Fresh, well-draining soil mix
- Sterile scissors or pruning shears
- Gloves — mandatory; calcium oxalate crystals in ZZ sap irritate skin and mucous membranes
- Powdered sulfur or activated charcoal (for treating cut roots)
- Newspaper or a tarp for your workspace
Removing the Plant and Inspecting the Roots
- Water 24–48 hours before repotting. Moist soil holds the root ball together and reduces root damage during extraction.
- Tip the pot sideways and gently ease the plant out. If it’s stuck, run a thin knife or trowel around the interior edge to break the seal.
- Inspect what you find: healthy roots are firm and white to tan; healthy rhizomes are plump and light tan to brown. Mushy, black, or brown roots need to be removed.
Trimming Roots and Treating Root Rot
Remove all mushy or blackened roots with sterile scissors and dust cut surfaces immediately with powdered sulfur or activated charcoal to prevent infection.
If root rot is present, take these extra steps:
- Rinse the root system under lukewarm water.
- Soak roots for 30 minutes in a 3% hydrogen peroxide solution diluted 1:4 with water.
- Let roots air-dry for 1–2 hours before repotting.
- Skip watering for 3–5 days after repotting to let cut surfaces callous.
Planting and Immediate Aftercare
- Add a layer of fresh mix to the bottom of the new pot.
- Position the plant so rhizomes sit roughly 1–2 inches below the pot rim.
- Fill in around the root ball, gently tamping to close air pockets without over-compacting.
- Water thoroughly until it drains from the bottom — this settles the soil and puts roots in contact with fresh medium.
- Move to bright indirect light and hold fertilizer for 4–6 weeks.
Post-Repotting Care
Light and Watering in the First Few Weeks
Keep the plant in bright indirect light (1,500–3,000 foot-candles) but away from direct sun for the first 2–4 weeks. Resume watering only when the top 2 inches of soil feel dry — fresh mix retains moisture longer than old, compacted soil, so check before you water rather than following a fixed schedule. A soil moisture meter like the XLUX T10 removes the guesswork entirely.
When to Resume Fertilizing
Fresh potting mix contains enough nutrients to carry the plant for several weeks. Start fertilizing again 4–6 weeks after repotting, using a balanced water-soluble fertilizer at half the recommended strength — something like Jack’s Classic All Purpose 20-20-20 works well. Feed monthly through spring and summer only; ZZ plants don’t need fertilizer in fall and winter.
Normal vs. Concerning Symptoms
A little leaf droop or one or two yellowing leaves in the first week is normal transplant stress. What’s not normal: rapid yellowing spreading through multiple stems, mushiness at the base, or a foul smell from the soil. Those symptoms point to rot, and you’ll need to act quickly.
How to Extend Time Between Repottings
Annual spring root check: Each spring, flip the pot and look at the drainage holes. Any roots emerging? That gives you 6–12 months of lead time — plenty of time to plan rather than scramble.
Top-dressing: If the plant isn’t root-bound but the soil looks tired, remove the top 1–2 inches of old soil and replace with fresh mix. This refreshes nutrients and improves surface drainage without the stress of a full repot, extending the interval by 6–12 months.
Watering habits: Water only when the top 2 inches of soil are dry, and never leave the pot sitting in standing water for more than 30 minutes. Chronic overwatering degrades soil structure faster than almost anything else, shortening the time before you need to repot out of necessity rather than choice.
Frequently Asked Questions About Repotting ZZ Plants
When should I repot my ZZ plant?
Repot every 2–3 years in spring or early summer as a general rule. Go sooner if you see the pot bulging, roots escaping drainage holes, or water running straight through without absorbing. ‘Raven’ can wait 3–4 years; compact ‘Zenzi’ even longer.
What happens if you don’t repot a ZZ plant?
In the short term, not much — ZZ plants tolerate being pot-bound better than most houseplants. Over time, though, the rhizomes compress the root zone, soil drainage fails, and the plant becomes increasingly prone to root rot and nutrient deficiency. Severely neglected plants can crack or deform their pots entirely.
Should I water my ZZ plant right after repotting?
Yes, for a healthy plant — water thoroughly immediately after repotting to settle the soil and initiate root contact with the new medium. Exception: if you treated root rot during the repot, skip watering for 3–5 days to let cut root surfaces callous before introducing moisture.
Can repotting a ZZ plant kill it?
Repotting itself is very unlikely to kill a ZZ plant — they’re tough. The real risks are choosing a pot that’s too large (leading to waterlogged soil and rot) or repotting into poorly draining mix. Follow the 1–2 inch size-up rule, use a well-draining blend, and hold fertilizer for 4–6 weeks, and your plant should come through without issue.
Can I divide my ZZ plant when I repot it?
Yes, and repotting is the perfect time to do it. Once the root ball is out, look for natural separation points between rhizome clusters and gently pull or cut them apart with a sterile knife. Each division needs at least one healthy rhizome and a few stems. Pot divisions individually and treat them like freshly repotted plants — bright indirect light, no fertilizer for 4–6 weeks.