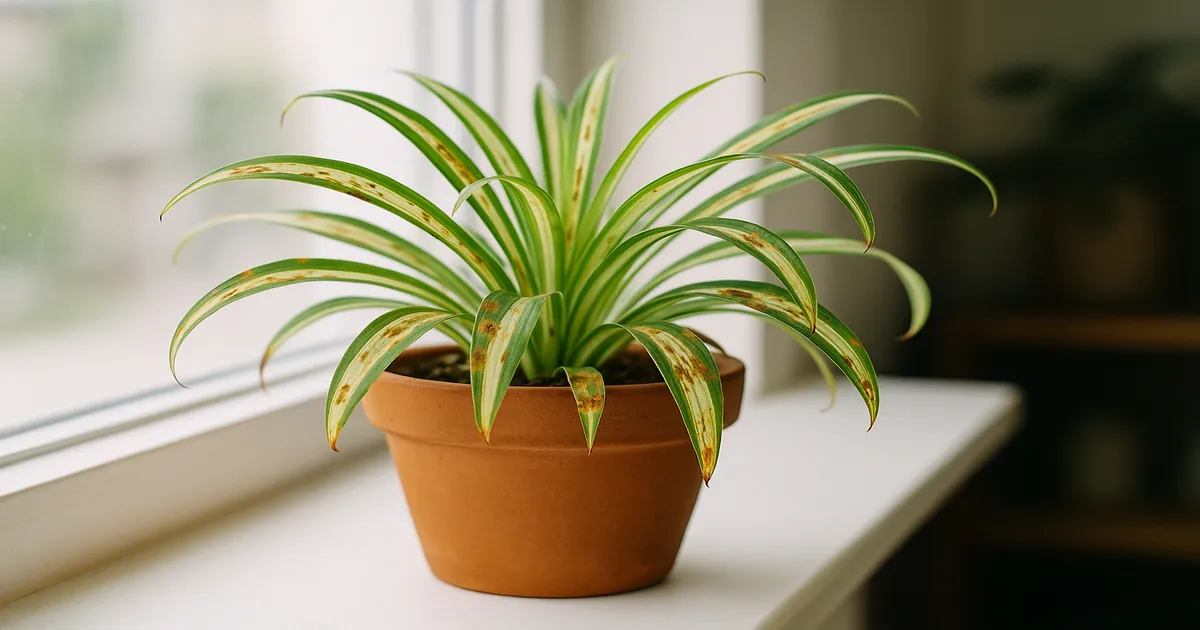
Quick Answer: Your spider plant is most likely wasting away due to chronic stress — overwatering and root rot are the top culprits, but fluoride toxicity, root-binding, and nutrient imbalances are close runners-up. The plant’s fleshy tuberous roots buffer stress for weeks before symptoms appear, so by the time you notice something is wrong, the problem has usually been building for a while. Identify the root cause first, then treat — most spider plants recover fully with the right intervention.
If you’re asking “why is my spider plant wasting away?”, you’re already ahead of most people. Chlorophytum comosum has a reputation for toughness that works against it — owners often don’t look closely until the decline is well advanced. The plant stores water and nutrients in its thick, fleshy roots, which act as a buffer against stress. Helpful in the short term, but it disguises problems for weeks.
Why Is My Spider Plant Wasting Away? The Most Likely Causes
Nine causes account for almost every case of spider plant decline:
- Overwatering and root rot — by far the most common
- Underwatering and drought stress
- Fluoride or chlorine toxicity from tap water
- Nutrient deficiency or over-fertilization
- Too little light (or too much direct sun)
- Root-bound crowding
- Pest infestations (spider mites, mealybugs, fungus gnats)
- Temperature stress or cold drafts
- Low humidity
Because spider plants tolerate neglect better than most houseplants, the tuberous roots keep them looking passable for weeks — right up until the point where they can’t anymore. Slow, progressive decline is the pattern to watch for.
Overwatering and Root Rot: The Number-One Reason Spider Plants Waste Away
How Root Rot Develops
Here’s the cruel paradox of root rot: the plant wilts and looks thirsty even though the soil is soaking wet. Waterlogged soil drives out oxygen, creating anaerobic conditions that favour fungal pathogens — primarily Pythium, Phytophthora, and Fusarium. These fungi destroy the root tissue the plant relies on to absorb water and nutrients. The more you water, the worse things get.
Symptoms of an overwatered spider plant:
- Yellowing that starts at the base and works upward
- Leaves that feel soft and translucent rather than firm
- Roots that are mushy, brown, or black (healthy roots are white to pale tan)
- Soil that smells sour or foul
- Wilting that doesn’t improve after watering
The key distinction: root rot browning is soft and mushy. Drought browning is crispy and dry. Getting this right determines your entire treatment approach.
Step-by-Step Fix for Root Rot
- Remove the plant from its pot and cut away all black, mushy, or foul-smelling roots with sterile scissors. A pair of precision pruning snips — such as Fiskars Micro-Tip Pruning Snips — makes clean cuts that minimize further damage.
- Treat cut surfaces with powdered cinnamon (a natural antifungal) or a 3% hydrogen peroxide solution diluted 1:4 with water.
- Repot into fresh, well-draining mix — aim for 40% potting soil, 30% perlite, and 30% coarse horticultural sand or pumice. A nutrient-rich base like Fox Farm Ocean Forest works well here.
- Choose a terracotta pot with drainage holes. Unglazed terracotta wicks moisture away from roots and accelerates drying between waterings.
- Withhold water for 3–5 days after repotting to let cut root ends callous over.
- Going forward, only water when the top 1–2 inches of soil are dry. In winter, let the top half of the soil dry out before rewatering.
- For severe infections, drench the soil with a biological fungicide containing Trichoderma species or Bacillus subtilis to outcompete remaining pathogens.
Water Quality and Drought: Other Common Causes of Decline
Signs Your Spider Plant Is Chronically Underwatered
Underwatering is less common than overwatering, but it does happen — especially in small terracotta pots or warm rooms. The pot will feel noticeably light, soil will pull away from the edges, and leaves will curl inward and feel papery. Spiderette production often stops entirely under moisture stress. Brown tips from drought are crispy and dry, never soft.
For severely dry plants, bottom-water by setting the pot in a basin of water for 20–30 minutes. Top-watering dry soil often just channels around the root ball without actually rehydrating it.
Fluoride Toxicity: A Hidden Cause of Brown Tips
Chlorophytum comosum is one of the most fluoride-sensitive houseplants in cultivation — this is well-documented in horticultural research, not just gardening folklore. Municipal tap water typically contains 0.7–1.0 mg/L of fluoride, and that accumulates in leaf tissue over months. Fluoride inhibits enzymes in the Calvin cycle and damages chloroplasts, gradually strangling photosynthesis.
The result is sharply defined brown necrotic tips that creep inward along the leaf margins over time, with older leaves showing symptoms first. Chlorine from tap water can cause mild tip burn too, but fluoride is the bigger problem — and simply letting water sit overnight only removes chlorine, not fluoride.
To fix fluoride toxicity:
- Switch to filtered, rainwater, or distilled water. This is the single most effective step. A pitcher filter such as the Brita Standard Water Filter Pitcher is an easy, low-cost solution.
- Flush the soil thoroughly every 2–3 months to leach accumulated fluoride salts.
- Avoid superphosphate fertilizers, which are high in fluoride. Bone meal or rock phosphate are safer alternatives.
- Keep soil pH between 6.0 and 6.5 — fluoride is less available to plants in mildly acidic conditions.
Nutrient Problems, Light, and Other Stressors
Identifying Nutrient Deficiencies
When a spider plant is starved of nutrients, it cannibalizes its older leaves to keep new growth going — a process called nutrient remobilization. The pattern of symptoms tells you which nutrient is lacking:
- Nitrogen deficiency: Generalized yellowing starting with older, lower leaves; overall pale green color; stunted growth
- Iron or manganese deficiency: Interveinal chlorosis on new leaves (tissue between the veins turns yellow while veins stay green) — usually a soil pH problem, not a true nutrient absence
- Potassium deficiency: Scorched or brown leaf margins, weak stems
Over-fertilizing causes a different but equally damaging problem. Excess fertilizer salts draw water out of roots via osmosis, chemically dehydrating the plant even in moist soil. Symptoms mimic drought: brown tips, wilting, crispy edges.
To correct nutrient imbalances:
- Test soil pH first with a home meter before adding any fertilizer. If pH is above 7.0, iron and manganese become chemically unavailable — no amount of fertilizer will fix that until pH is corrected. A reliable option is the Apera Instruments AI-209 pH Meter.
- For general deficiency, apply a balanced water-soluble fertilizer (10-10-10 or 20-20-20) at half the recommended strength, monthly during spring and summer only.
- For interveinal chlorosis, apply chelated iron as a soil drench or foliar spray.
- For salt buildup, flush the soil with 3–4 pot-volumes of water, then withhold fertilizer for 4–6 weeks.
- Never fertilize in fall or winter. Unused nutrients accumulate as damaging salts.
Light: Too Little or Too Much
Spider plants can survive in low light, but “survive” is different from “thrive.” In dim conditions, photosynthesis slows to the point of gradual starvation. Variegated cultivars like ‘Variegatum’ are especially vulnerable — they may revert to solid green as the plant maximizes chlorophyll production. The minimum for survival is around 50–250 foot-candles, but bright indirect light (1,500–3,000 foot-candles) is where these plants genuinely perform well.
Too much direct sun causes the opposite problem. Direct sunlight degrades chlorophyll faster than the plant can replace it, producing white or pale yellow patches and bleached streaks — localized to whichever part of the leaf faced the sun. This is distinct from uniform yellowing.
Position the plant 3–5 feet from an east- or north-facing window for reliable bright indirect light. Use a sheer curtain to diffuse intense afternoon sun through south- or west-facing windows. In winter, a full-spectrum LED grow light running 12–14 hours daily can bridge the gap.
Root-Bound Stress, Pests, and Temperature
Spider plants fill a pot quickly. When roots run out of space, the tiny amount of remaining soil dries out within a day or two, and circling roots restrict water flow in a way that’s similar to girdling. Mild root-binding actually stimulates spiderette production — it’s a stress response that triggers reproduction — but severe crowding tips into decline. If roots are emerging from drainage holes or mounding above the soil surface, repot into a container 1–2 inches larger in diameter. Don’t jump to an oversized pot, which holds too much moisture.
Stressed plants also attract pests. Spider mites leave stippled, silvery foliage and fine webbing; mealybugs appear as white cottony masses at leaf bases; fungus gnat larvae damage fine root hairs in moist soil. Treat active infestations immediately with insecticidal soap or neem oil before addressing anything else.
Temperature stress is easy to overlook. The optimal range is 65–80°F (18–27°C). Below 50°F (10°C), cell membranes begin to rupture, producing water-soaked patches that turn black or mushy — usually on whichever side of the plant faces the cold source. Below 35°F (2°C), most cultivars won’t survive. Low humidity (below 40% RH) amplifies every other stressor and encourages spider mites. Aim for 50%+ RH.
How to Revive a Wasting Spider Plant: Recovery Action Plan
Step 1: Diagnose Before You Act
Treating the wrong problem wastes time and can make things worse. Work through this checklist first:
- Check soil moisture — soggy, bone dry, or appropriately moist?
- Unpot and inspect roots — white and firm is healthy; brown and mushy is rot; tightly circling is root-bound
- Examine leaf symptoms — crispy vs. soft; tip burn vs. full yellowing; stippling vs. bleached patches
- Check for pests — look under leaves and at soil level
- Assess light and temperature — near a cold window, a vent, or in a dim corner?
Step 2: Treat the Primary Cause First
- Root rot → repot immediately
- Active pest infestation → treat before doing anything else
- Severe drought → bottom-water, then reassess
- Cold damage → move to a warm location and remove blackened tissue
Step 3: Optimise for Recovery
After addressing the primary cause, stack conditions in the plant’s favour:
- Water only when the top 1–2 inches of soil are dry
- Switch to filtered or rainwater
- Provide bright indirect light (1,500–3,000 foot-candles)
- Maintain 65–80°F and 50%+ humidity
- Hold fertilizer until new growth appears, then resume at half strength
Minor stress — a few yellow leaves, mild tip burn — typically resolves in 2–4 weeks. Root rot or serious pest damage takes longer: expect 2–3 months before the plant looks genuinely healthy again. Be patient and resist the urge to over-correct.
Preventing Future Decline: Long-Term Care Tips
Always check the top 1–2 inches of soil before watering — not the calendar. Use a well-draining mix, choose pots with drainage holes, and consider terracotta in humid rooms. A soil moisture meter removes the guesswork entirely.
Use filtered, rain, or distilled water as your default. Flush the soil every 2–3 months to clear accumulated salts and fluoride. Feed with a half-strength balanced fertilizer monthly from spring through summer, then stop completely in fall and winter. Test soil pH annually — staying in the 6.0–6.5 range prevents most nutrient availability problems before they start.
A five-minute weekly check catches almost every problem before it becomes serious. Look at leaf color and texture, the undersides of leaves for pests, the soil surface for fungus gnats, and pot weight as a quick moisture indicator. The slow, creeping decline that makes spider plants appear to waste away is almost always preventable if you catch the signal in its first week.
Frequently Asked Questions
Why is my spider plant wasting away even though I water it regularly?
Regular watering is often the problem, not the solution. Spider plants need the top 1–2 inches of soil to dry out between waterings. If you’re watering on a fixed schedule regardless of soil moisture, you’re likely overwatering — which leads to root rot and prevents the plant from absorbing water or nutrients even though the soil is wet. Unpot the plant and check the roots: white and firm means healthy; brown and mushy means root rot.
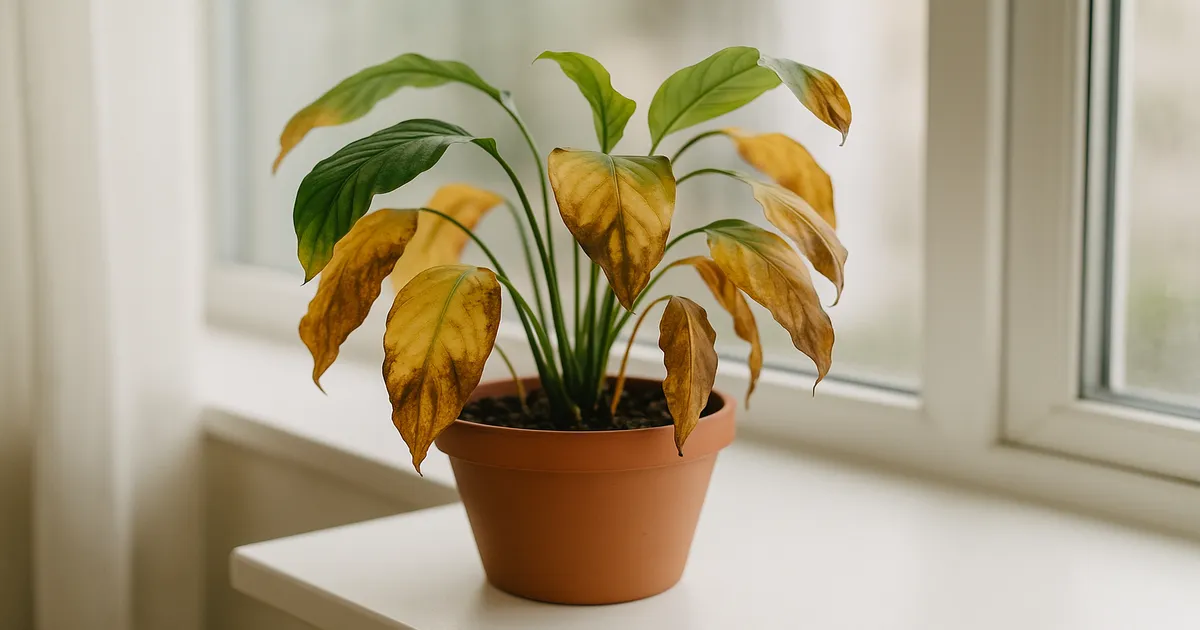
Why are my spider plant’s leaves turning yellow and falling off?
Yellowing that starts at the base and progresses upward is the classic sign of overwatering or root rot. Uniform pale yellowing across the whole plant points to nitrogen deficiency or insufficient light. Check soil moisture first: soggy soil means root rot; dry soil suggests nutrient starvation or drought. Correct the primary cause and remove the worst-affected leaves cleanly.
Why does my spider plant have brown tips but otherwise looks healthy?
Brown tips on an otherwise healthy plant almost always point to fluoride toxicity from tap water, or occasionally to low humidity or salt buildup from over-fertilizing. Switch to filtered or distilled water, flush the soil every 2–3 months, and avoid superphosphate fertilizers. If you’re in a dry climate or running central heating, raising humidity above 50% RH will also help.
Why has my spider plant stopped producing spiderettes?
Spiderette production slows or stops when the plant is under stress — most commonly from insufficient light, chronic underwatering, or being recently repotted into a much larger pot. Mild root-binding actually encourages plantlet production, so don’t rush to repot if the plant is otherwise healthy. Move it to a brighter spot, ensure consistent moisture, and wait — spiderettes typically return once conditions stabilize.
Can a severely wasted spider plant be saved?
Usually yes, as long as some healthy roots remain. Even a plant with significant root rot can recover if you remove all damaged tissue, repot into fresh well-draining mix, and correct the underlying conditions. The key is acting quickly — the longer damaged roots stay in wet soil, the further the rot spreads. Give a severely affected plant 2–3 months before drawing conclusions about its recovery.